

GPS Tracking Software Manual
Check all features and quickly learn how to use it
Getting started
First of all, please create a new account:
- Visit:
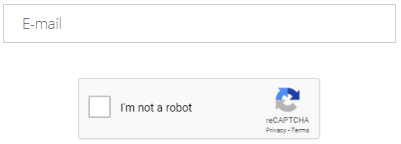
- Enter your email and click on the security tickbox:
- Click "Register"
- After a few minutes check your email for login details
- Visit:
- Select tracking server from select box:

- Sign in after selecting the server
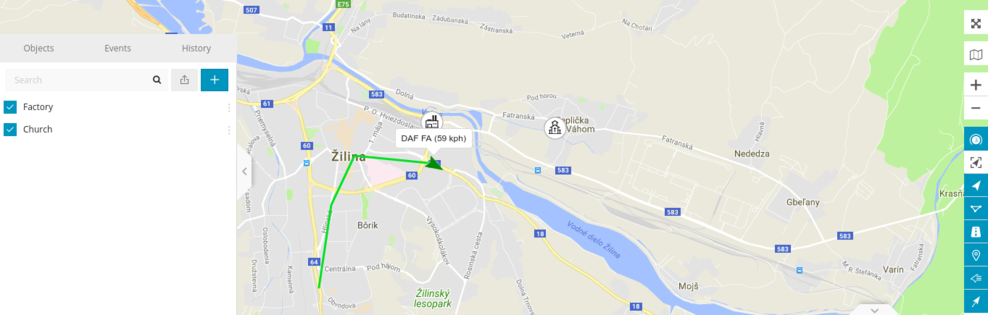
Workspace overview
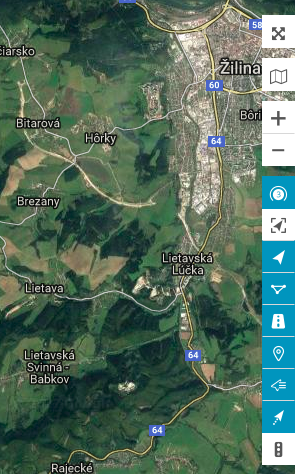
After logging in, you will be redirected to the platform main page. This page allows to access most common tracking features and settings, monitor object position on map ant get detailed information such as speed, address, coordinates, history and more.
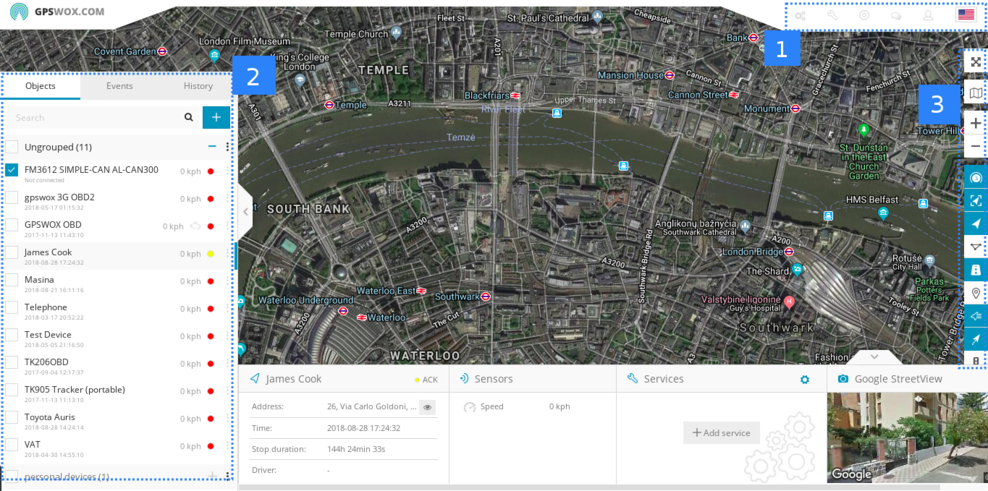
- Menu
- Navigation panel
- Map control
Menu
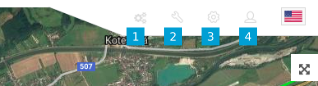
- Admin panel
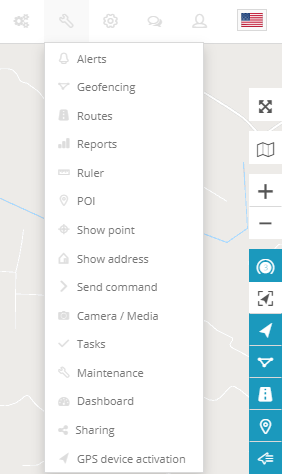
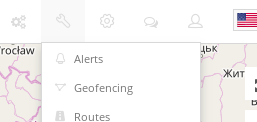
- Tools
- Setup
- Account
Menu is used to quicly access frequently used tools and settings. Also you can easily change your language by clicking flag at the top right corner. Please check separate user manual pages for , and .
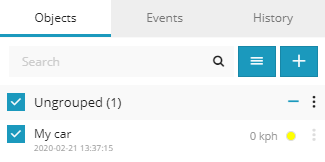
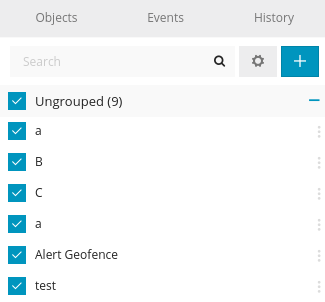
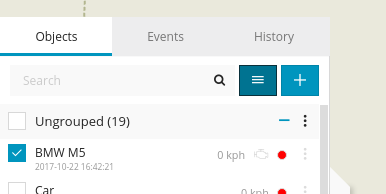
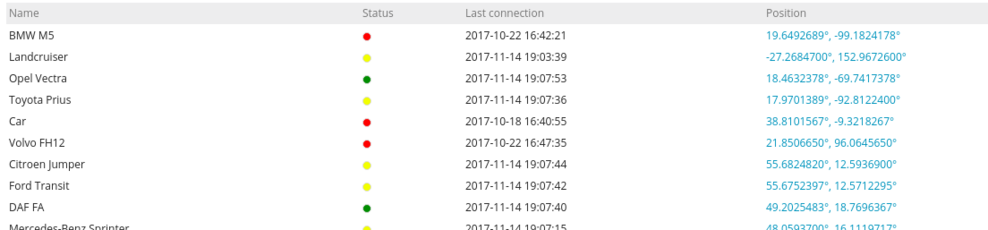
Navigation panel
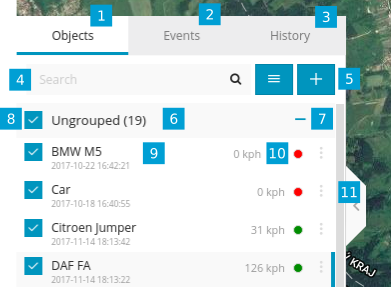
- Objects tab - view and manage all devices
- Events tab - history of events and alerts/notifications can be viewed (overspeeding, geofence alert, low battery, etc.)
- History tab - view detailed history for each gps device, graphs, data log
- Search - find devices by name or imei
- Add device - add new gps devices
- Groups - group name and number of devices in that group
- Groups expander - expand or collapse groups
- Visibility checkbox - turns on or off objects visibility on map
- Object information - device name, date, time of last received location, online/idle/offline status
- Speed - shows current object speed
- Edit Object - change device icon, assign to a group, add and manage sensors, follow, accuracy settings and more.
Object details panel
This panel allows you to see more information about object. It appears when you select your object. There are 2 options: show less(standard) and show more.
In show less popup you will see address, stop duration, sensors. In show more popup you will see additional information like services, protocol, etc.

Map control
- Full screen mode - hides all tools and shows only gps devices in the map
- Change map - change map to streets, sattelite and more
- Zoom - zoom in and out in the map
- Objects tickbox - show or hide objects in the map
- Geofences tickbox - show or hide geofences in the map
- Routes tickbox - show or hide routes in the map
- POI tickbox - show or hide POI in the map
- Show names - show or hide objects names above icon in the map
- Show tails - show or hide objects tails in the map
Creating and activating GPS devices (manually)
Creating a device
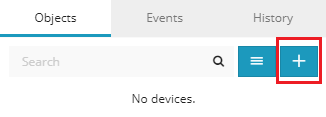
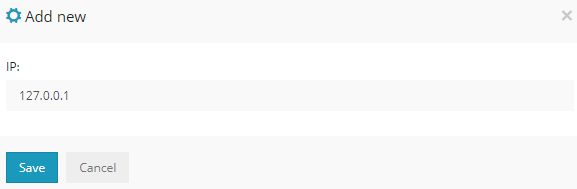
To get started in creating and configuring a device, on the left panel under the "Devices" tab select the "+" icon.
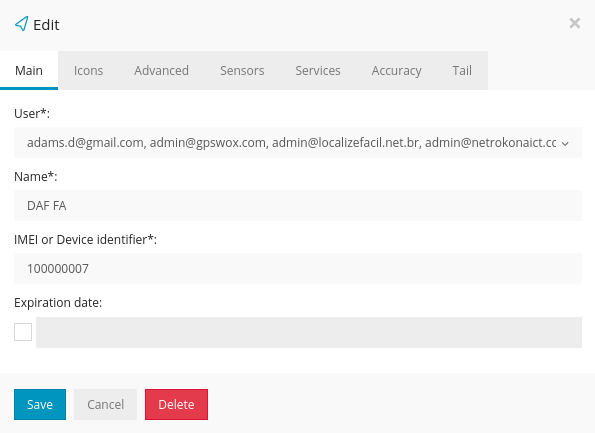
A new menu will appear asking to fill out the name of the object and IMEI.
The IMEI of the device can be found printed in a sticker on the device.
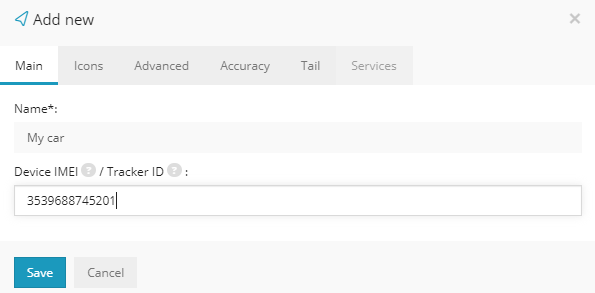
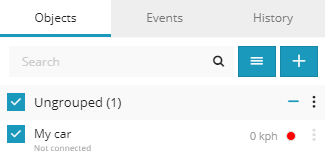
Once the objects details are filled in, select "Save" and the created device will appear in the device list.
Configuring a device
Most GPS tracking devices are configurable using a series of SMS commands. The most important configurations in order for the tracking device to be acknowledged by the server are the IP address of the server you are using, the port of the device, APN name and username and password (if required by the data carrier) and time zone, which should be set to UTC-0.
To check which port your device uses, check our supported trackers page . A list of IP addresses of our server can also be found in the supported trackers page. Make sure to refer to the user manual of your specific device for SMS configuration commands.
Below is an example of SMS commands used for Coban GT02A devices:
Timezone#e0# - Timezone settings (UTC-0)
Apn#APNname#APNusername#APNpassword# - APN details. If there are no credentials for the APN, can be left blank.
Ip#138.201.205.20#6002# - IP address and port configurations.
Upload#10# - Data upload interval (seconds)
Once the device is configured, it will come up online.
Please allow up to 1 minute for the server to receive the first data packet from the device.
Creating and activating GPS devices (automatically)
Creating a device
The software provides at tool that allows you to configure a GPS tracking device to send data to your server without having to manually sends SMS messages.
Devices can be configured from the platform that are designed to receive SMS messages for IP, APN and port configurations. Trackers that require specific software to be configured cannot be set up using the GPS Device Activation tool.
It is also required to setup an SMS gateway in order to send SMS messages for configuration. Refer to the SMS Gateway section from the manual .
To get started in creating and configuring a device, on the left panel under the "Devices" tab select the "+" icon.
A new menu will appear asking to fill out the name of the object and IMEI. The IMEI of the device can be found printed in a sticker on the device. Once the information is filled out, select the "GPS device activation" option and select the manufacturer of the device and the APN of the SIM data carrier.
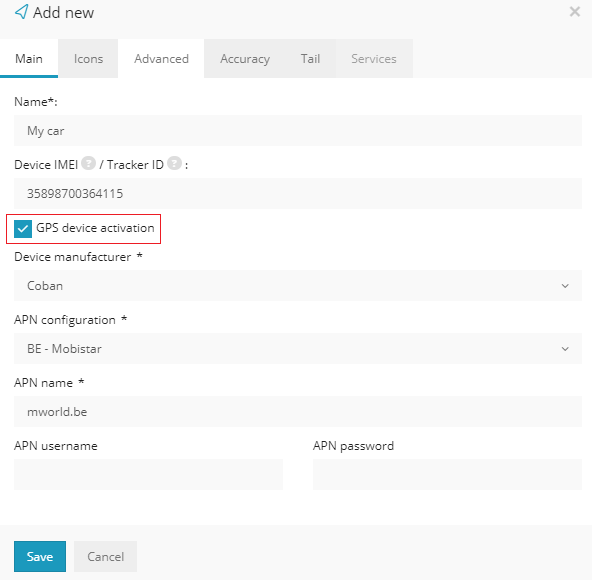
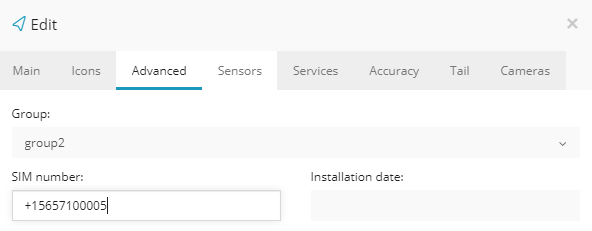
NOTE: Make sure to enter the phone number of the SIM card with the country code in the objects details -> Advanced tab.
If there are additional APN configurations that you would like to add or additional manufacturers with SMS commands, the settings are located in the Administrator panels "Content" tab.
This is only available in the White Label software.
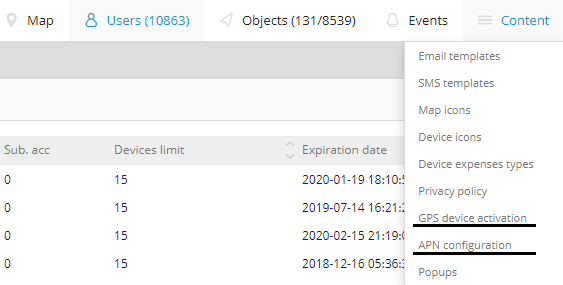
GPS device activation
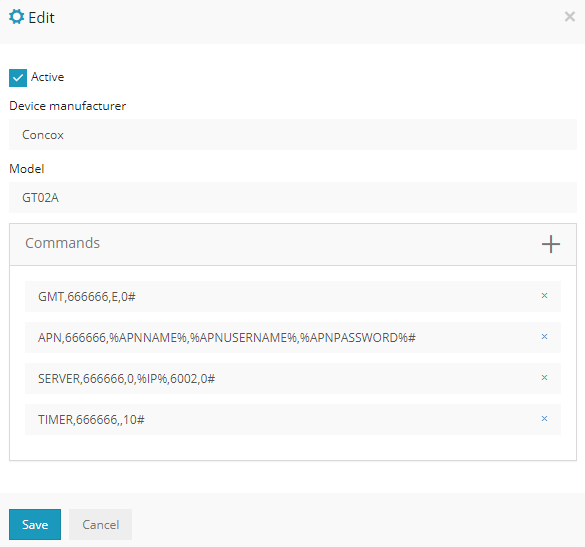
The following menu displays all of the available manufacturers and models.
To add new commands for a different manufacturer, select the "+" icon in the right corner.
Or if an already existing manufacturers commands need to be added/adjusted, under "Actions" select the gear icon.

Within the menu, enter the manufacturer and the model of the device.
For the SMS commands, select the "+" icon and type in the required command to configure the device. If the device requires more than one command to be configured and in a specific order, press the "+" button again and another line for the commands will be added. Add as many command lines as necessary for the device. The order in which the commands will be sent is from top to bottom.
When adding the commands to the list, instead of using the actual APN names and IP addresses, include the variables as the system automatically recognizes the APN configurations and the IP address.
APN variables:
- %APNNAME% - This is the APN name of the SIM data provider.
- %APNUSERNAME%, %APNPASSWORD% - These are usernames and passwords for the APN. If the data carrier does not require login credentials, these will be sent blank by the system.
IP Address variable:
- %IP% - The system automatically inputs Your server IP address into the configuration.
Once the details are entered, select "Save" and the recently added manufacturer with the commands will be added to the list.
APN configuration
All of the SIM data carriers with APN details are listed in the APN configuration menu. To add an additional provider, select the "+" icon on the right side of the menu. Or if the APN configurations need to be correct, under "Actions", select the gear icon.

When creating a new APN configuration, a window will come up, prompting to enter the name of the data carrier, the APN name, APN username and password. The information has to be filled in according to the providers details.
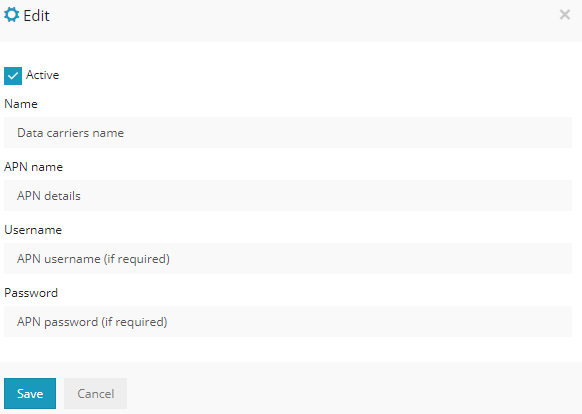
When the information is filled in, select "Save" and the data carrier with its APN details will be added to the list.
Setup
In setup window you can setup multiple settings for all your gps trackers, create groups, drivers, custom events, sms gateway, sms templates, gprs templates.
Main

In the main tab you can define speed, capacity, altitude measurements and also select timezone for all your gps trackers. At the bottom there is server region and IP address you are logged in to. For daylight saving time (DST) it is always recommended to use Automatic option and select your own country.
Object groups

In "Object groups" tab you can create groups for your gps devices. To assign a device of your created group, go to Object->Edit->Advanced->Group, select your created group and click Save.
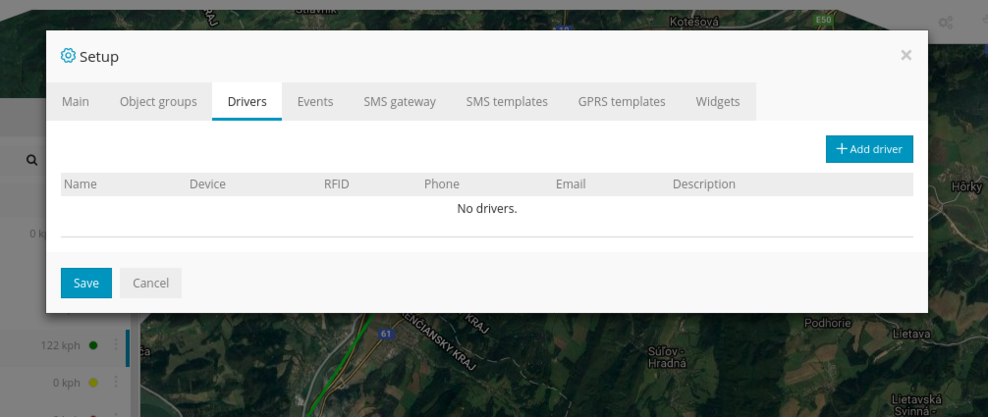
Drivers
Here you can create drivers, click "Add driver" to create one. Type in any name and select your gps device. If your device has iButton or RFID, type in rfid/ibutton number in RFID field. GPS server automatically identifies gps device protocol and decodes rfid message. After creating new driver, swipe the card/item over your rfid device and you should see driver name in the left bottom panel or by clicking on the object.
Events
Here you can define your custom events. For example you can define that if SOS button is pressed, device battery ran low, etc. event will be triggered.
To know which protocol to select, please connect your gps device to the platform and check object details:

In the picture above and in the example below there is a protocol - "teltonika".
Before digging deeper creating an event, please take a look at the schema below for better understanding how data travels from gps tracker to gps server and how it is proccessed:

To check what parameters your gps tracker is sending, please go to History->Select object->Show history->Data log
(At the top there are parameter names and below - parameter values)
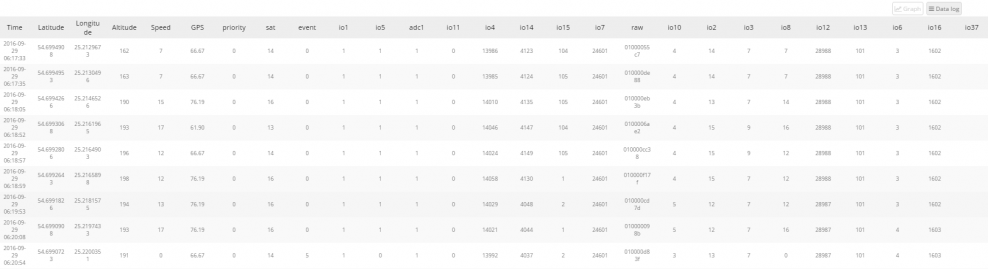
There are many parameter names like "sat, adc1, io21..." etc. So if you want to create an event for parameter "sat", then you have to input sat in the parameter name field. This will pair event with parameter.
Note: some gps tracker's, like Coban GPS306 OBD, are sending parameter names that are easily recognisable(odometer, fuel, rpm, etc.), but others, like Teltonika are sending them like ioXXX. To know the meaning of parameter names like ioXXX, you need to check manufacturer's user manual/documentation or identify them manualy, for example, trigger some sensors and monitor parameters at the same time like doors open, fuel level, etc...
Example 1
In the picture above we showed event for teltonika gps device FM1010. We know that io66 parameter stands for "external power" and we also know that if parameter's value drops below 1000 it means that engine was turned off. We can check later messages and we will see that in the data log, this parameter value will go lower after the engine is turned off. So in the event tab we need to select protocol teltonika, input io66 in the parameter name field, select less than in the next select box and input 1000 in the last field. In the message field write in what text you want to see when event is triggered.
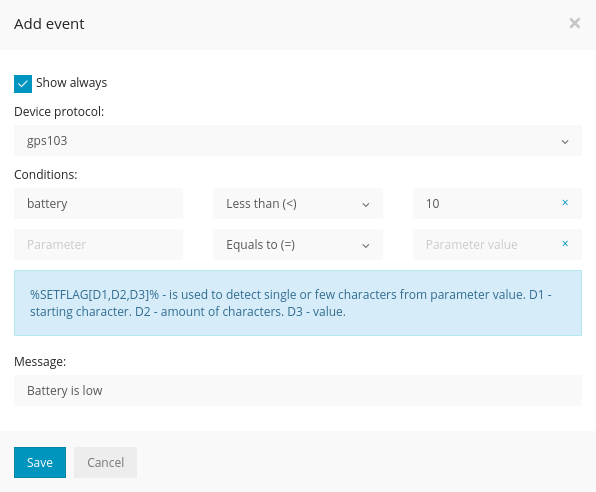
Example 2
Let's say your parameter name is battery and you want to create "Low battery" event. In the Add event window, select device protocol, input parameter name battery, select less than and input any value you want, for exampe 10 or 15. In the message field write in any text you want. Now when device battery goes down to 10 or 15, event will be triggered.
Example 3
Now let's create SOS event. For example, coban gps tracker, when sos button is pressed, sends parameter alarm: help me, then all we have to do is just enter alarm in the parameter name field, select equals to and write in help me in the parameter value field.
Note: events will be triggered if alert for it is created: Tools->Alerts->Add new
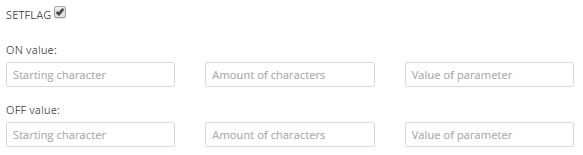
Setflag exaplanation:
For example, tracker is sending status like this:
00010(moving, sos alarm), 10010(not moving, sos alarm).
4th number means if sos is sent. Other number can mean other statuses, so instead of creating event for each possible status combination, you can just use setflag, to detect only 4th number from the string.
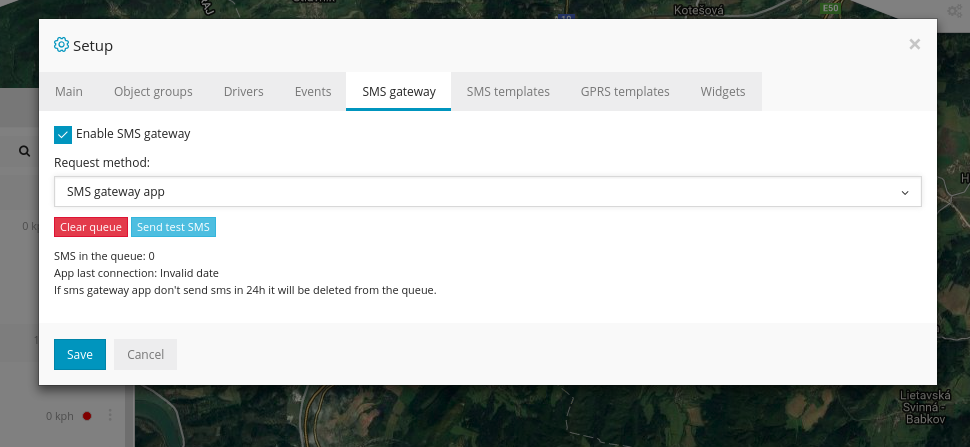
SMS gateway
Here you can configure SMS gateway. You need to have your own sms gateway provider like bulksms, plivo, clickatell or any other. After enabling SMS gateway, your devices can receive alerts/notifications about events via SMS. Also you can send sms messages to your devices via Tools->Send command
If you like, you can use your android smartphone as sms gateway using this app:
After installing this app, make sure it has to send SMS messages.
If you are using url(passing data via url string), make sure to select GET as request method.
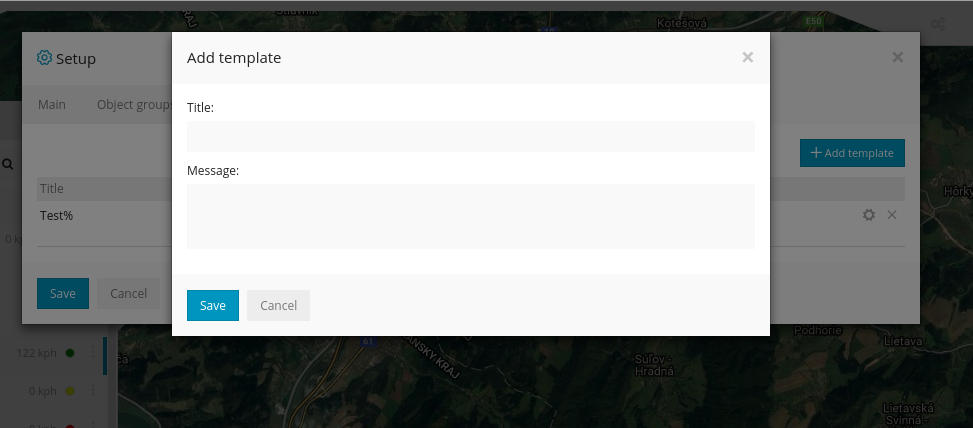
SMS templates
Created templates can be used in Tools->Send command. So you don't need to type in the same sms message all over again.
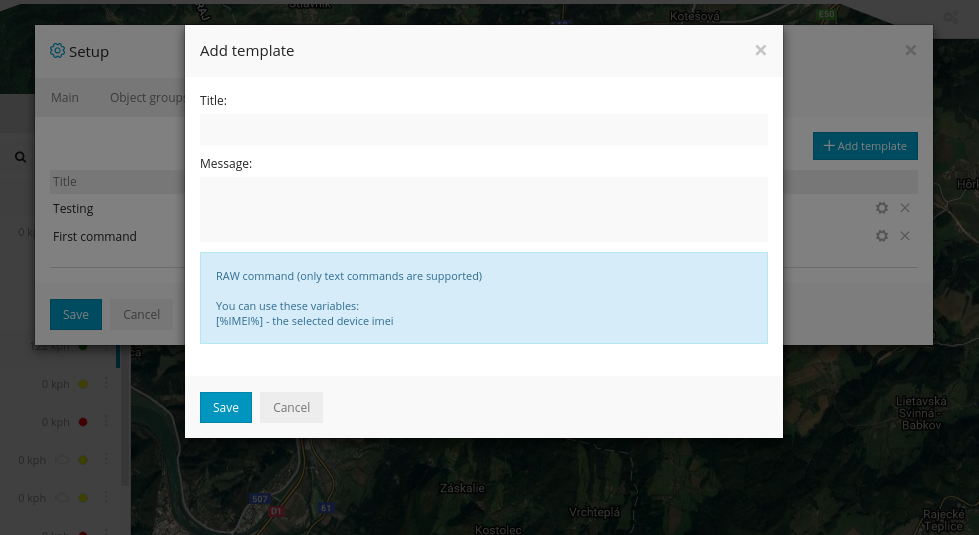
GPRS templates
Created templates can be used in Tools->Send command, so you don't need to type in command all over again. Also, variable [%IMEI%] will help you to resuse the same template for multiple gps trackers.
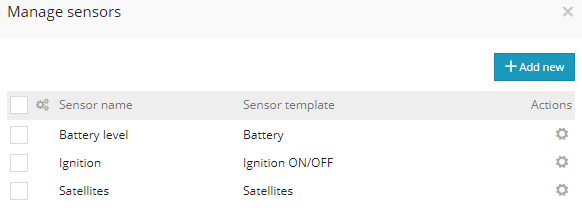
Sensor management
To add new sensor (engine on/off, acc on/off, battery, fuel tank, odometer, temperature, door open/close, GSM signal, GPS signal, sattelites, tachometer, etc.) for your object, go to Object->Edit object->Sensors->Add new sensor. But before doing that, take a look below at the scheme, how parameters are sent from gps device and how they need to be paired with sensors.
To check what parameters your gps tracker is sending, please go to History->Select object->Show history->Data log
(At the top there are parameter names and below - parameter values)
There are many parameter names like "sat, adc1, io21..." etc. So if you want to create an event for parameter "sat", then you have to input sat in the parameter name field. This will pair event with parameter.
Note: some gps tracker's, like Coban GPS306 OBD, are sending parameter names that are easily recognisable(odometer, fuel, rpm, etc.), but others, like Teltonika are sending them like ioXXX. To know the meaning of parameter names like ioXXX, you need to check manufacturer's user manual/documentation or identify them manualy, for example, trigger some sensors and monitor parameters at the same time like doors open, fuel level, etc...
ACC ON/OFF
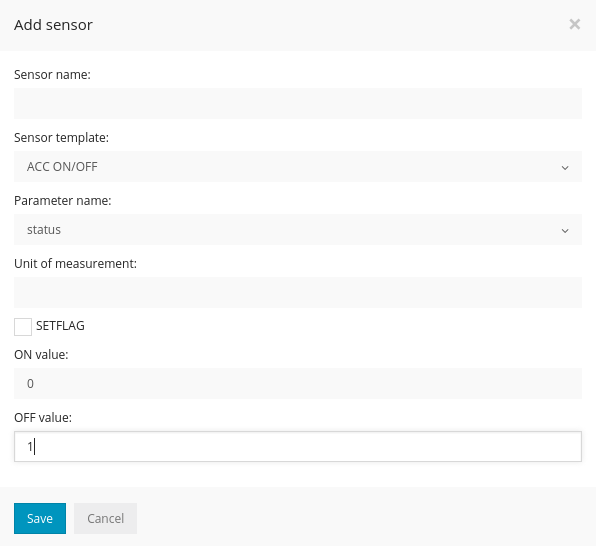
- Sensor name - in this field you can write in any name you like. This name will appear as sensor name in object details panel when you click on the object.
- Sensor type - this is type of sensor, each sensor type has different parameters input options and behaviour.
- Parameter name - parameter names are identified automatically once gps tracker is connected to the platform, select the coresponding parameter that matches your sensor.
- Unit of measurement - this text will be showed near value, for example, if you define battery sensor, then you can type in % as unit of measurement, then you will see battery sensor like "battery: 25%"
- ON value - please input parameter value to identify that acc was turned on. For example.: if parameter name is alarm: acc on, type in acc on
- OFF value - please input parameter value to identify that acc was turned off. For example.: if parameter name is alarm: acc off, type in acc off
- Setflag - is used to detect single or few characters from parameter value. Example.: 12345 is parameter value and „34“ is the value you want to use, so setflag would be: 3(starting character), 2(ammount of characters), 34(value of parameter)“.
Battery
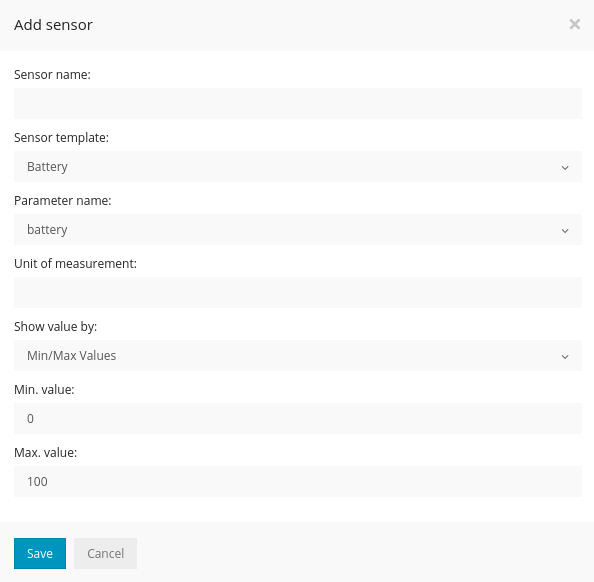
- Sensor name - in this field you can write in any name you like. This name will appear as sensor name in object details panel when you click on the object.
- Sensor type - this is type of sensor, each sensor type has different parameters input options and behaviour.
- Parameter name - parameter names are identified automatically once gps tracker is connected to the platform, select the coresponding parameter that matches your sensor. Example: battery: 75 (visible in data log) must be selected as battery. In the exaple above "sat" is selected which means that you can use any type of sensors with any type of parameter.
- Unit of measurement - this text will be showed near value, for example, if you define battery sensor, then you can type in % as unit of measurement, then you will see battery sensor like "battery: 25%"
- Show value by "Parameter value" - parameter value will be shown.
- Show value by "Min/Max values" - for example if full battery value is 5, minimum 0, please type in 5 in the max value field and 0 in the min value field, so it will automatically convert it to percentage values. For example.: if value is 5 - 100 will be show, if value is 4 - 75 will be show, if value is 0 - 0 will be seen.
- Show value by "Formula" - parameter value can be sent from gps tracker encoded and you have to use formula to calculate battery value. For example.: if value is 2850, then you can type in formula like "([value] x 3.3)/4096", for example: ([28501] x 3.3)/4096 = 22.96 %
- OFF value - please input parameter value to identify that acc was turned off. For example.: if parameter is alarm: acc off, type in acc off
Doors Open/Close

- Sensor name - in this field you can write in any name you like. This name will appear as sensor name in object details panel when you click on the object.
- Sensor type - this is type of sensor, each sensor type has different parameters input options and behaviour.
- Parameter name - parameter names are identified automatically once gps tracker is connected to the platform, select the coresponding parameter that matches your sensor.
- Unit of measurement - this text will be showed near value, for example, if you define battery sensor, then you can type in % as unit of measurement, then you will see battery sensor like "battery: 25%"
- ON value - please input parameter value to identify that acc was turned on. For example.: if parameter name is alarm: acc on, type in acc on
- OFF value - please input parameter value to identify that acc was turned off. For example.: if parameter name is alarm: acc off, type in acc off
Engine On/Off

- Sensor name - in this field you can write in any name you like. This name will appear as sensor name in object details panel when you click on the object.
- Sensor type - this is type of sensor, each sensor type has different parameters input options and behaviour.
- Parameter name - parameter names are identified automatically once gps tracker is connected to the platform, select the coresponding parameter that matches your sensor.
- Unit of measurement - this text will be showed near value, for example, if you define battery sensor, then you can type in % as unit of measurement, then you will see battery sensor like "battery: 25%"
- ON value - please input parameter value to identify that acc was turned on. For example.: if parameter name is alarm: acc on, type in acc on
- OFF value - please input parameter value to identify that acc was turned off. For example.: if parameter name is alarm: acc off, type in acc off
Engine hours
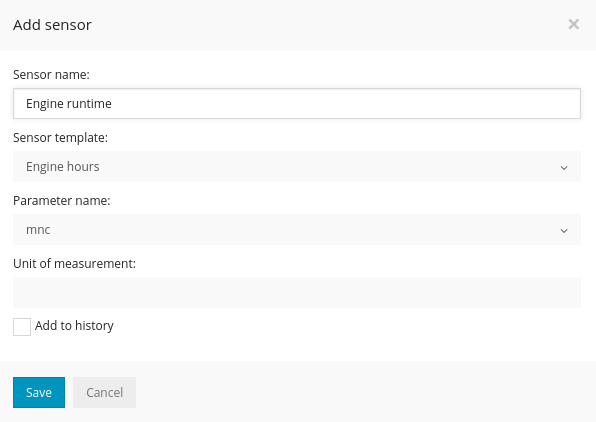
- Sensor name - in this field you can write in any name you like. This name will appear as sensor name in object details panel when you click on the object.
- Sensor type - this is type of sensor, each sensor type has different parameters input options and behaviour.
- Parameter name - parameter names are identified automatically once gps tracker is connected to the platform, select the coresponding parameter that matches your sensor.
- Unit of measurement - this text will be showed near value, for example, if you define battery sensor, then you can type in % as unit of measurement, then you will see battery sensor like "battery: 25%"
Fuel tank
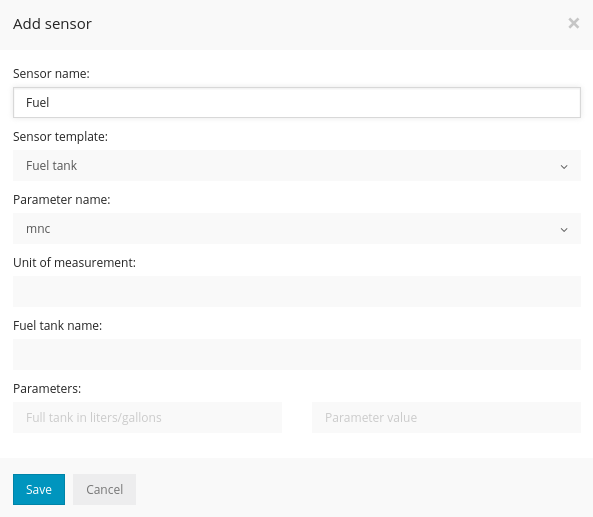
- Sensor name - in this field you can write in any name you like. This name will appear as sensor name in object details panel when you click on the object.
- Sensor type - this is type of sensor, each sensor type has different parameters input options and behaviour.
- Parameter name - parameter names are identified automatically once gps tracker is connected to the platform, select the coresponding parameter that matches your sensor.
- Unit of measurement - this text will be showed near value, for example, if you define battery sensor, then you can type in % as unit of measurement, then you will see battery sensor like "battery: 25%"
- Fuel tank name - any name like Petrol, Diesel etc.
- Parameters - for example if tacker is sending fuel in percentage value like 100 and your car's full tank is 40 liters, then type in 40 on the left side(full tank) and 100 on the right side(parameter value), so when tracker sends parameter value 50, you will see that your car's fuel tank is 20 liters or gallons.
Fuel tank with calibration
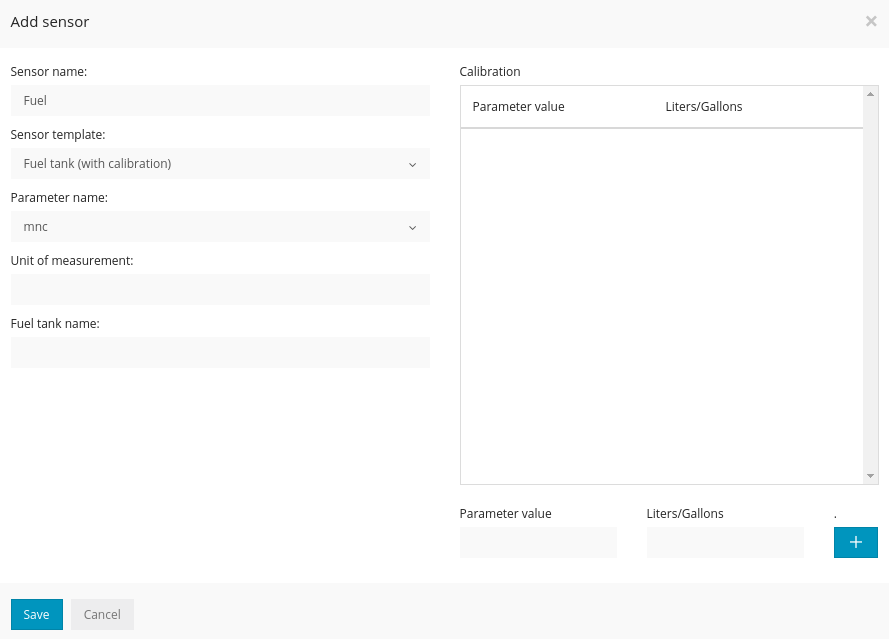
- Sensor name - in this field you can write in any name you like. This name will appear as sensor name in object details panel when you click on the object.
- Sensor type - this is type of sensor, each sensor type has different parameters input options and behaviour.
- Parameter name - parameter names are identified automatically once gps tracker is connected to the platform, select the coresponding parameter that matches your sensor.
- Unit of measurement - this text will be showed near value, for example, if you define battery sensor, then you can type in % as unit of measurement, then you will see battery sensor like "battery: 25%"
- Fuel tank name - any name like Petrol, Diesel etc.
- Calibration - gps trackers can send fuel level in voltages or any other values, therefore calibration is needed. Above is example of parameter value and matching liters/gallons value. It is best to start calibration with full tank and check parameter value and then move on with empty fuel tank and check parameter value again.
GSM
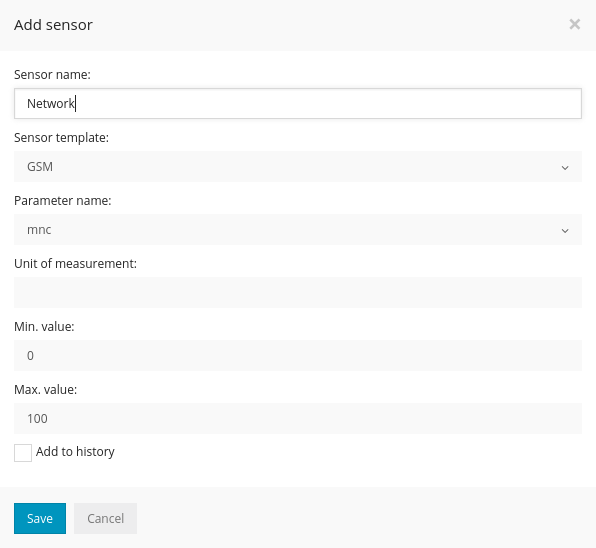
- Sensor name - in this field you can write in any name you like. This name will appear as sensor name in object details panel when you click on the object.
- Sensor type - this is type of sensor, each sensor type has different parameters input options and behaviour.
- Parameter name - parameter names are identified automatically once gps tracker is connected to the platform, select the coresponding parameter that matches your sensor.
- Unit of measurement - this text will be showed near value, for example, if you define battery sensor, then you can type in % as unit of measurement, then you will see battery sensor like "battery: 25%"
- Show value by "Min/Max values" - for example if full battery value is 5, minimum 0, please type in 5 in the max value field and 0 in the min value field, so it will automatically convert it to percentage values. For example.: if value is 5 - 100 will be show, if value is 4 - 75 will be show, if value is 0 - 0 will be seen.
Harsh acceleration and harsh braking
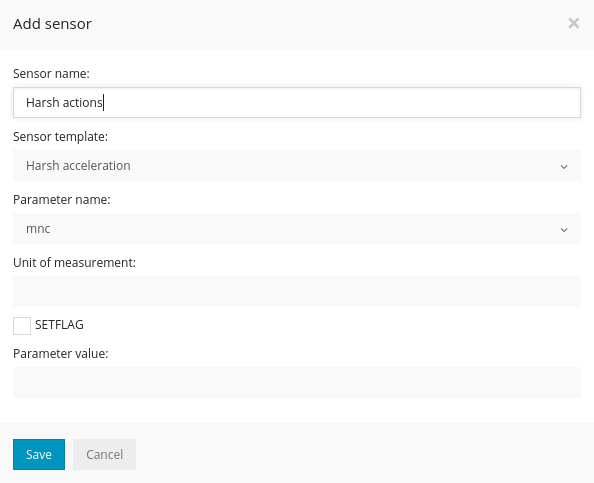
- Sensor name - in this field you can write in any name you like. This name will appear as sensor name in object details panel when you click on the object.
- Sensor type - this is type of sensor, each sensor type has different parameters input options and behaviour.
- Parameter name - parameter names are identified automatically once gps tracker is connected to the platform, select the coresponding parameter that matches your sensor.
- Parameter value - value for detecting harsh acceleration or braking. Once values configured, you can then generate driver behavior report: Tools->Reports->RAG
Ignition ON/OFF
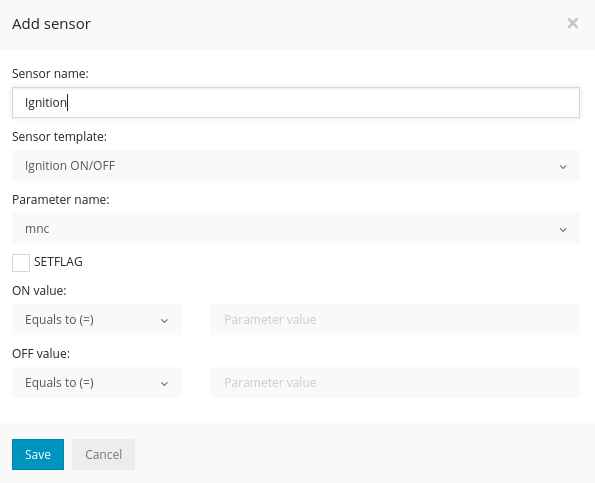
- Sensor name - in this field you can write in any name you like. This name will appear as sensor name in object details panel when you click on the object.
- Sensor type - this is type of sensor, each sensor type has different parameters input options and behaviour.
- Parameter name - parameter names are identified automatically once gps tracker is connected to the platform, select the coresponding parameter that matches your sensor.
- Unit of measurement - this text will be showed near value, for example, if you define battery sensor, then you can type in % as unit of measurement, then you will see battery sensor like "battery: 25%"
- ON value - please input parameter value to identify that acc was turned on. For example.: if parameter name is alarm: acc on, type in acc on
- OFF value - please input parameter value to identify that acc was turned off. For example.: if parameter name is alarm: acc off, type in acc off
Odometer (connected and virtual)
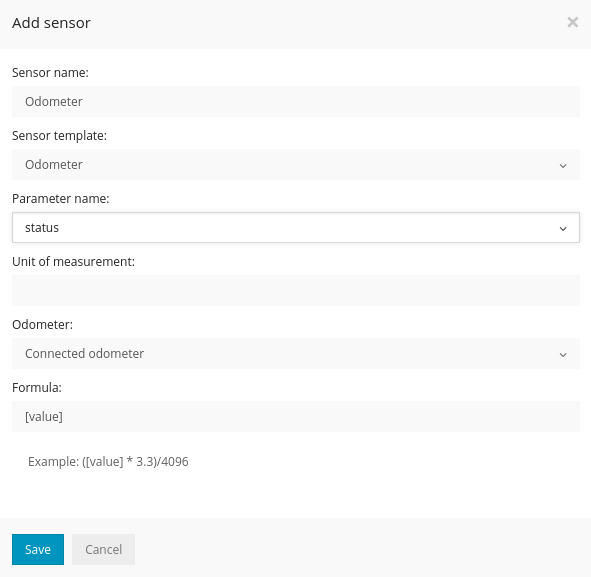
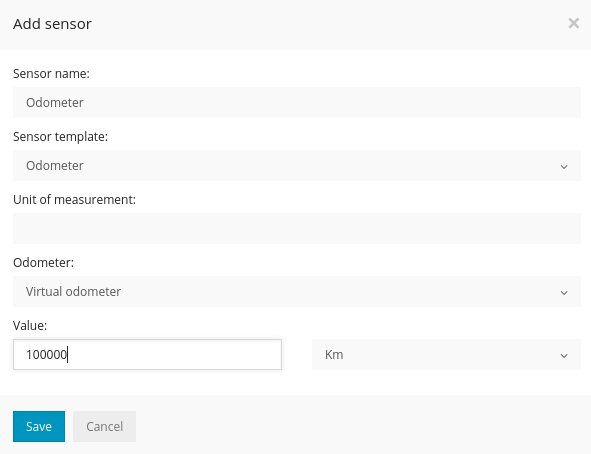
- Sensor name - in this field you can write in any name you like. This name will appear as sensor name in object details panel when you click on the object.
- Sensor type - this is type of sensor, each sensor type has different parameters input options and behaviour.
- Parameter name - parameter names are identified automatically once gps tracker is connected to the platform, select the coresponding parameter that matches your sensor.
- Unit of measurement - this text will be showed near value, for example you can define km or mi
- Odometer - if you selected connected odometer, please pair it with parameter that is responsible for connected odometer value, otherwise please select Virtual Odometer.
- Forumula - value can be sent in meter, kilometers, miles, feets, etc., so using formula you can apply correct calculations.
Satellites
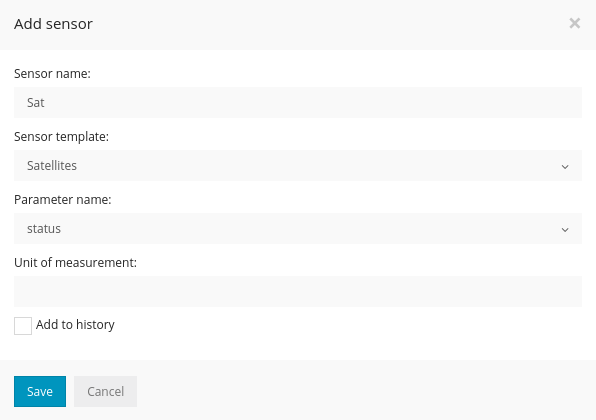
- Sensor name - in this field you can write in any name you like. This name will appear as sensor name in object details panel when you click on the object.
- Sensor type - this is type of sensor, each sensor type has different parameters input options and behaviour.
- Parameter name - parameter names are identified automatically once gps tracker is connected to the platform, select the coresponding parameter that matches your sensor.
- Unit of measurement - this text will be showed near value, for example, if you define battery sensor, then you can type in % as unit of measurement, then you will see battery sensor like "battery: 25%"
Tachometer/RPM or temperature

- Sensor name - in this field you can write in any name you like. This name will appear as sensor name in object details panel when you click on the object.
- Sensor type - this is type of sensor, each sensor type has different parameters input options and behaviour.
- Parameter name - parameter names are identified automatically once gps tracker is connected to the platform, select the coresponding parameter that matches your sensor.
- Unit of measurement - this text will be showed near value, for example, if you define battery sensor, then you can type in % as unit of measurement, then you will see battery sensor like "battery: 25%"
- Forumula - using formula you can apply correct calculations.
Device management
Object popup
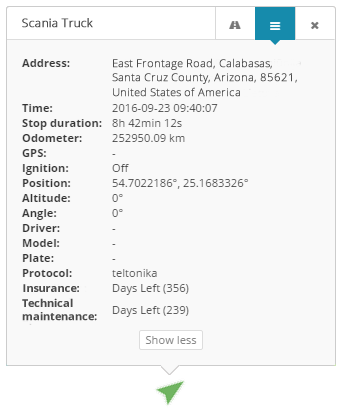
In the minimized popup window you can monitor basic information and sensors. Once you click "Show more", you will see all available information for this device including sensors, services, additional data. If you want ot check what parameters your device is sending, please visit sensor management section.
Object quick tools
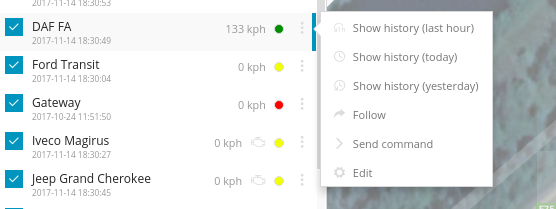
- Show history - this will instantly show history of the object for most common selected period.
- Follow - new window will appear where you will be able to monitor each object individually, you can open multiple windows at the same time.
- Send command - quick access to send command to the device via gprs or sms.
- Edit - edit device name, imei, accuracy, change icon, add services and more.
Edit - Main
Edit - Icons
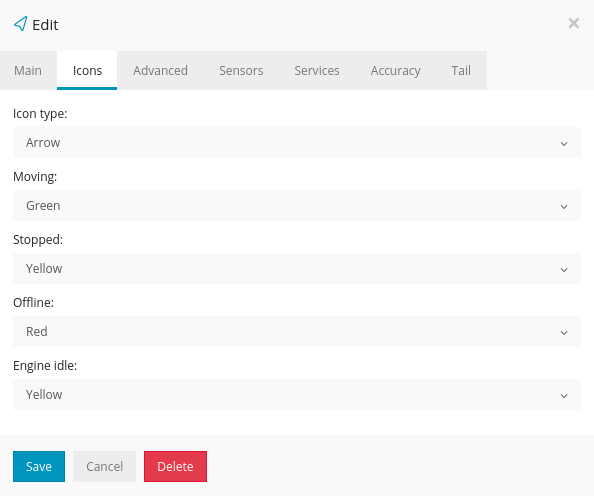
- Arrow - arrow with direction and color(green, yellow, red) will be shown. This is default and recommended selection as it gives you the most control and information.
- Rotating icon - vehicle icon visible from the top will be show, it will rotate according to the direction.
- Icon - simple icon will be shown without direction and status.
Icon type - Arrow. There are 4 states:
- Moving - when device speed is higher than minimum speed defined in edit->accuracy->min. moving speed
- Stopped -when device speed is lower than minimum speed defined in edit->accuracy->min. moving speed
- Offline - if device is not sending information to the server 5 or more minnutes or is disconnected from the gps server
- Engine idle - for engine idle to be active, you need to add sensor for ignition on/off or engine on/off and then add that sensors in edit->accuracy->engine hours(switch from gps). Engine idle means that ignition/engine is on but device is not moving.
Edit - Advanced
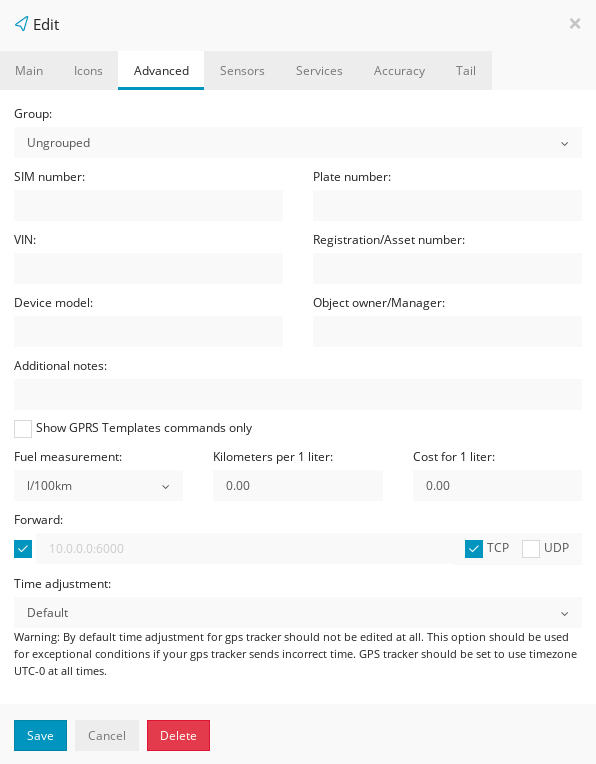
- Show GPRS Tempaltes commands only - if you tick it, then only custom gprs commands will be showed for your device in Tools->Send command. GPRS templates can be created in Setup->GPRS Tempaltes
- Fuel measurement - if you do not have fuel sensors connected to your gps device, you can input measurements here so they will corespond in history and reports.
- Forward - Platform will copy and send raw device data to given IP and port in UDP or TCP connection.
- Time adjustment - this will manually adjust time individually for selected gps device. Used only in those cases, when you are unable to set timezone to UTC 0 for your device.
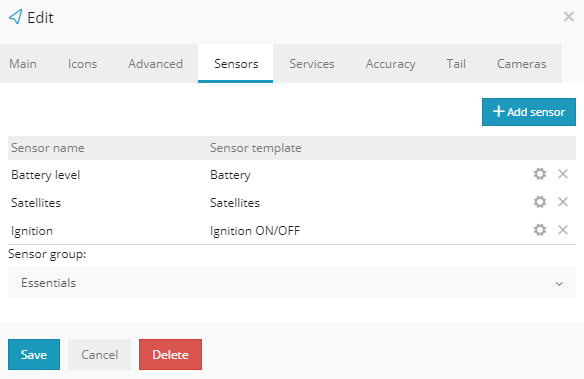
Edit - Sensors
Please check sensor managment page for detailed documentation.
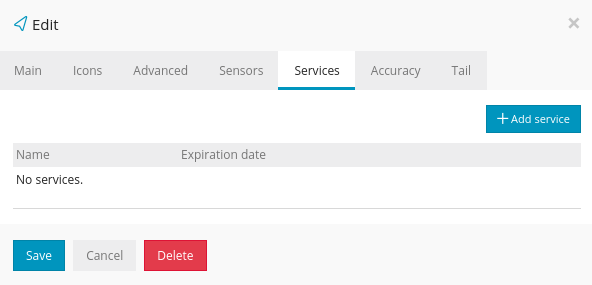
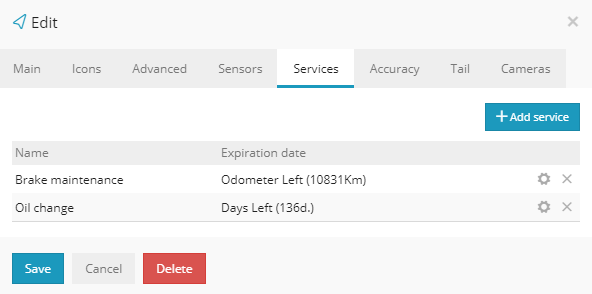
Edit - Services
Edit - Accuracy
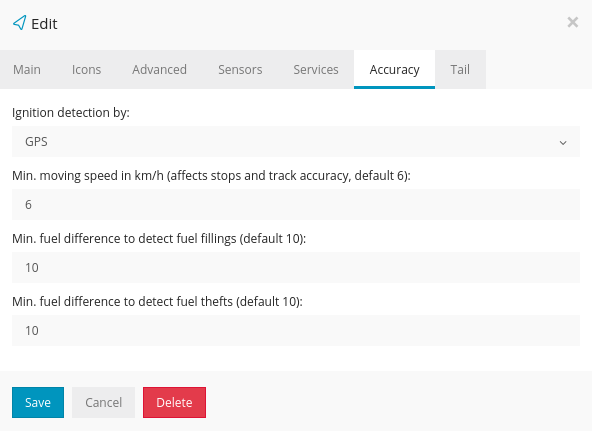
- Engine hours - default selection is GPS, but if you have ignition or engine sensor connected to your gps tracker it is highly recommended to select it here. Once selected, if ignition is off you will not see unecessary history(like drifting), engine hours, distance, events like geofence or overspeed will not be triggered, therefore you will get the most accurate information including reports.
- Min. moving speed - if speed is below min. speed, moving will not be registered.
- Min. fuel difference to detect fuel fillings - if sensor value increases instantly by 10 units or more, fuel filling will be detected.
- Min. fuel difference to detect fuel thefts - if sensor value decreases instantly by 10 units or more, fuel theft will be detected.
To prevent the platform from registering false movement when staying at one location and GPS points are not accurate "Min. Moving speed' value should be increased. Additionaly if device has an ignition sensor - adding it will stop platform registering location points when object ignition is off.
Edit - Tail
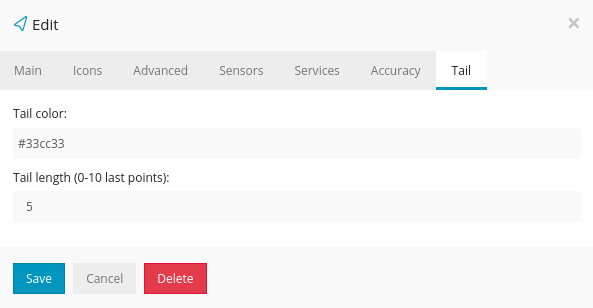
- Tail color - select color of the object tail
- Tail length - how long is the tail
Tools: Overview
Tools are used to create alerts/notifications, geofences, POI's, send commands to GPS trackers, generate reports and many more.
Tools: Alerts
To create an alert choose "Alerts" in "Tools" menu on the main map window and press "Add alert" button (blue "+" symbol icon) on alerts panel.
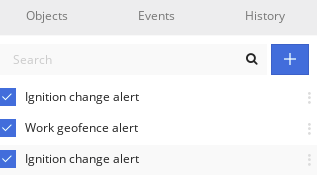
A new panel window will be opened. Start creating an alert by filling required information.
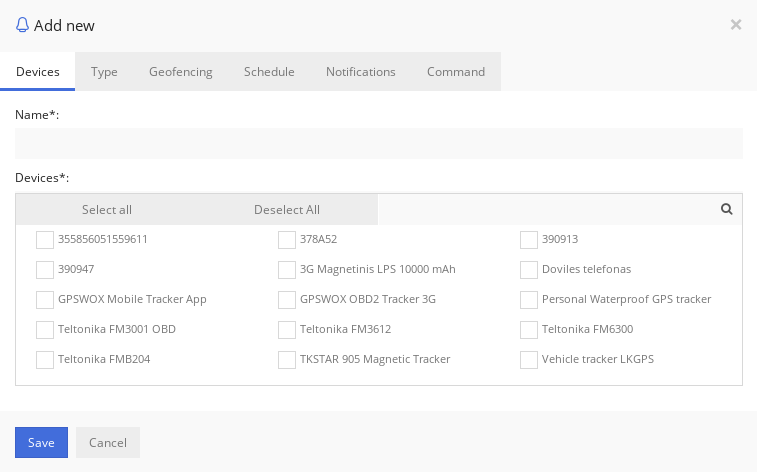
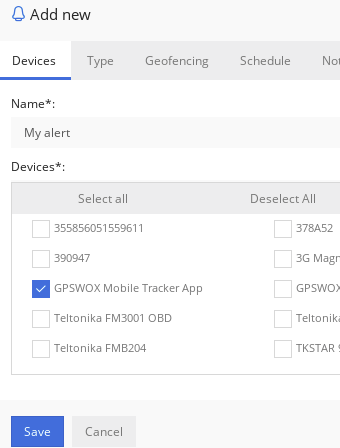
Devices
Enter alert name (required) and select objects (required) for which alert will generate.
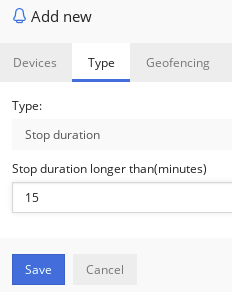
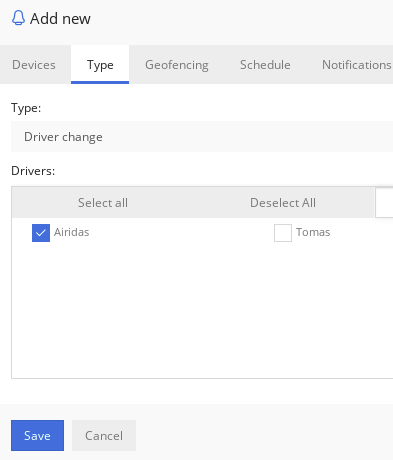
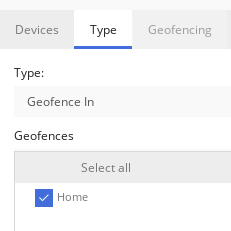
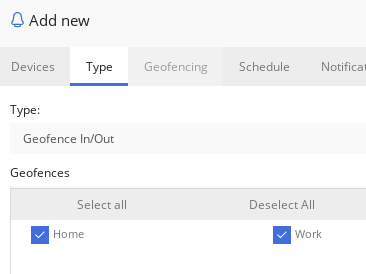
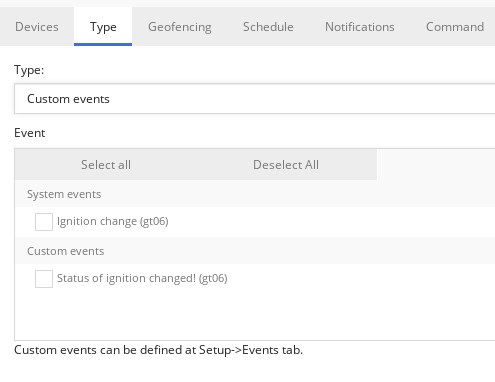
Type
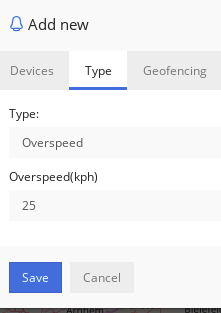
Select alert type from the list. There are 7 types described as follows.
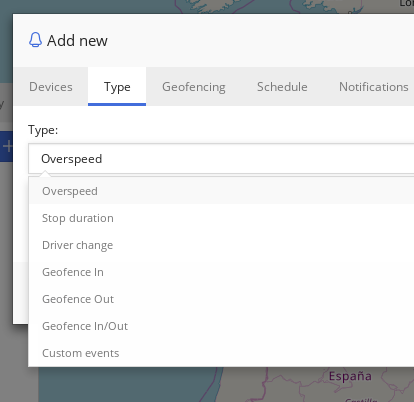
Overspeed - this alert will generate when objects overspeed the value entered.
Stop duration - this alert will generate when object is not moving for defined time in minutes.
Driver change - this alert will generate when driver on object changes from selected drivers in the list.
Geofence In - this alert will generate when object travels into geofence.
Geofence Out - this alert will generate when object travels out of geofence.
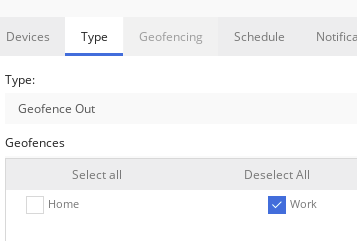
Geofence In/Out - this alert will generate when object travels in or out of geofence. Note that when selecting "Geofence In", "Geofence out" or "Geofence In/Out" alert types, "Geofencing" tab will be disabled.
Custom events - this alert will generate when user created custom or system wide events are generated.
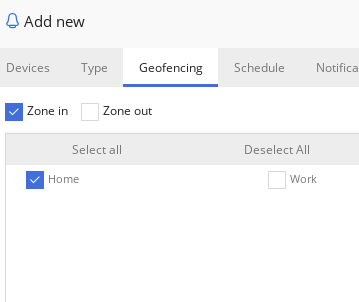
Geofencing
Select geofences that will generate alert when object will be moving inside or outside geofence. This will work together with other type of alerts. For example it will generate overspeed alert only when moving inside or outside geofence.
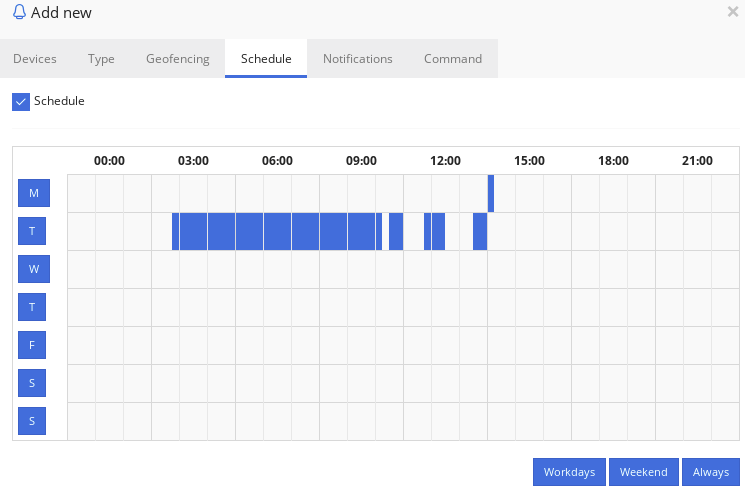
Schedule
Select when alert will be active. Press the mouse and paint on the calendar table. One table item is 15 minutes. Exact time stamp can be seen by hovering over the item with a mouse.
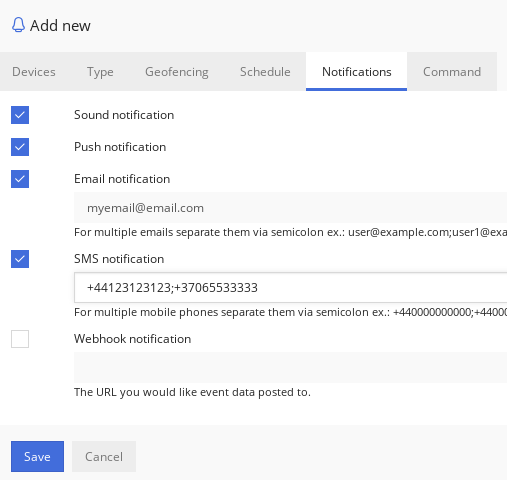
Notifications
Select which notifications a user will get when alert generates.
There are sound notification that makes sound on web browser once alert generates.
Push notifications works also on mobile apps.
Email notification will send an email.
SMS notifications will be sent to the numbers provided. SMS Gateway must be enabled to show this part of Notifications.
Webhook notification request is HTTP POST with JSON body.
Note: With PHP POST body you can get like this: $json = file_get_contents('php://input');
The webhook incoming data .
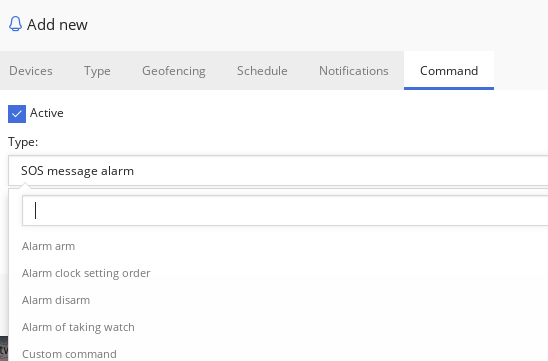
Command
Select command to activate when alert generates. Command will be sent to device trough GPRS network.
Tools: Geofencing
Create a geofence
To create a new geofence, click Tools->Geofencing->Add geofence. Type in geofence name and select it's color, then click on the map to begin drawing geofence. When you finish drawing geofence, duoble click the last point and click Save.

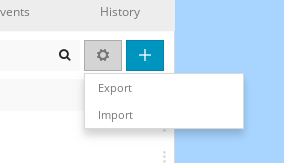
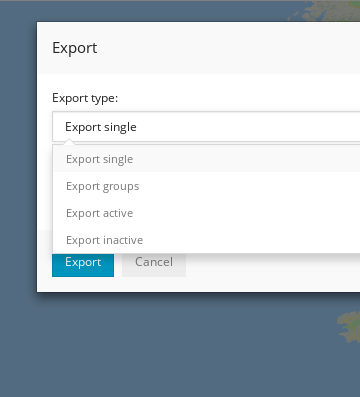
Import and export
To import or export geofence click the button with a gear icon:
.gexp file structure
It is a simple text file that has following structure.
Example (single):
{"groups":[],"geofences":[{"id":1130,"group_id":0,"name":"vn","coordinates":"[{\"lat\":48.108348176168,\"lng\":14.284973144531},{\"lat\":48.111099041065,\"lng\":14.403076171875},{\"lat\":48.035855735787,\"lng\":14.400329589844}]","polygon_color":"#a34949"}]}
Format:
"groups" - name of the group geofence belongs. Emtpy [ ] means ungrouped.
"geofences" - list of geofences. Inside it requires "id", "group_id", "name" and "coordinates" to be filled. "Coordinates" requires a list of "lat" and "lng" of coordinates to be filled.
"polygon_color" - color in html hex code.
Tools: Reports
Main
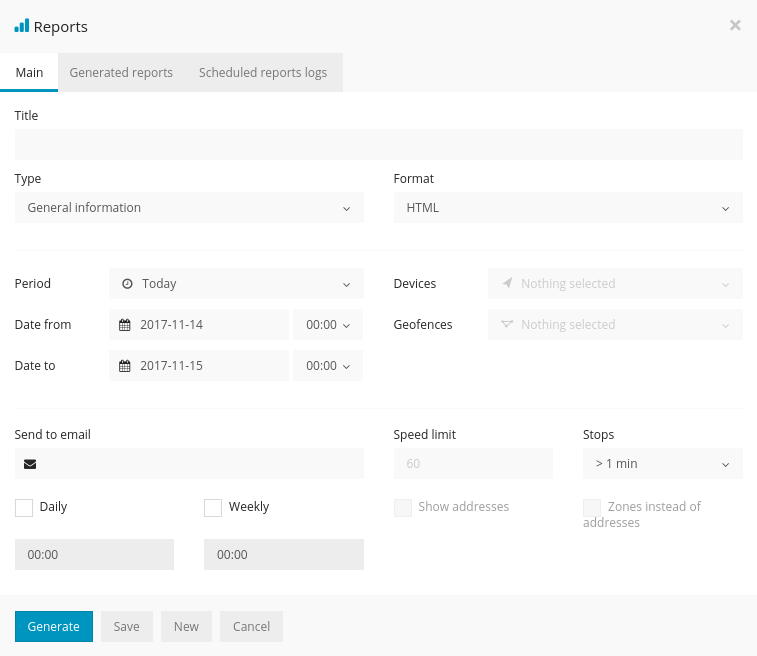
Report
- Title - report title/name
- Type - select report type
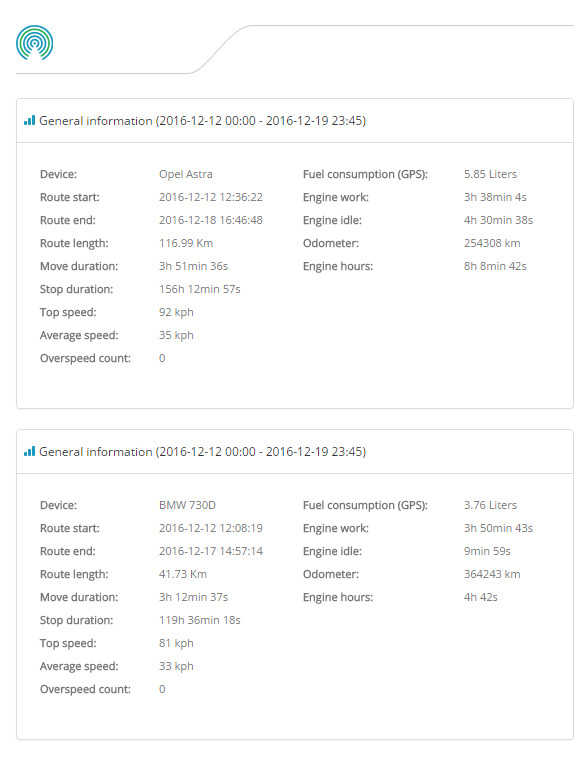
- General information - report shows some basic information: top speed, average speed, consumed fuel, route length etc.
- General information (merged) - general information displayed in a row.
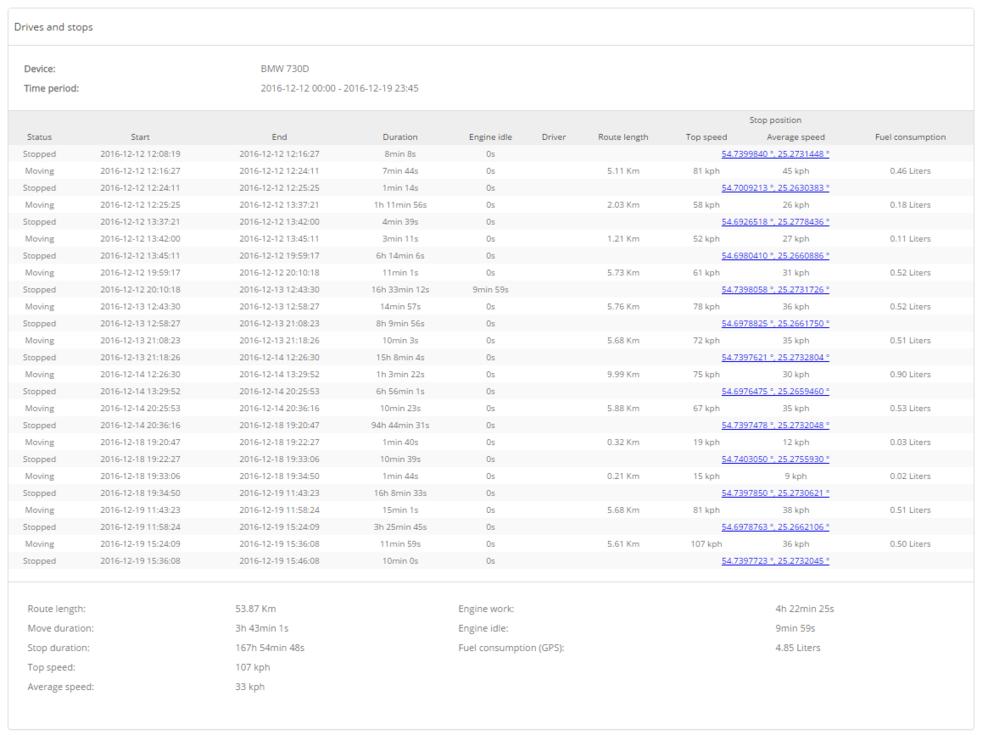
- Drives and stops - same information as general report but added: objects stops and driving information, like duration of intervals between stops, address where object stopped.
- Travel sheet - displays coordinates and addresses of stops, fuel consumption, lenght between stops.
- Overspeeds - speeding cases will be displayed in report as well as additional information such as excess time, how much speed has been exceeded.
- Underspeeds - underspeeding cases will be displayed in the report.
- Geofence in/out - entry/exit time in each zone and out zone, stay time in zone.
- Events - events information: event name coordinates and address, time.
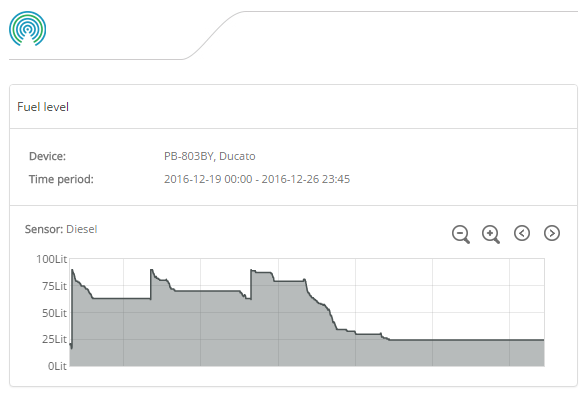
- Fuel level - information about fuel level changes.
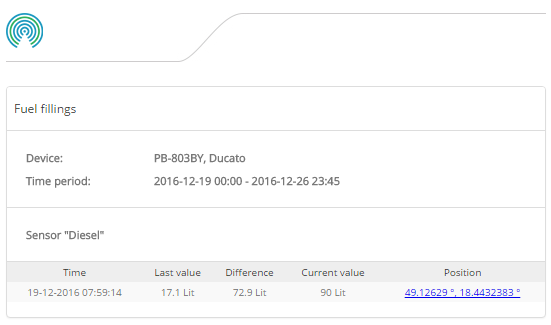
- Fuel fillings - object fuel fillings history.
- Fuel thefts - object fuel thefts history.
- Format - select format that report will be generated: PDF (for viewving in Adobe Acrobat Reader), HTML (for viewing in browser), XLS (for viewing and editing in Microsoft Excel)
- Show addresses - near to location points addresses will be shown.
- Zones instead of addresses - instead of addresses zone names will be shown.
- Stops - set time of stops to eliminate traffic light stops.
- Speed limit (kph) - speed limit for Overspeed and Underspeed reports.
Schedule
- Daily - reports will be sent every day for previous day.
- Weekly - reports will be sent oncein a week, every Monday for previous week.
- Send to e-mail - enter e-mail addresses separated by comma to send reports to.
Devices
Select devices to create report.
Geofences
This allows to select zones whose details will be seen in report. Zone selection is available only if Report type Zone in/out is chosen.
Time period
- Filter - easy wayto set time period.
- Time from/ Time to - set time period of report.
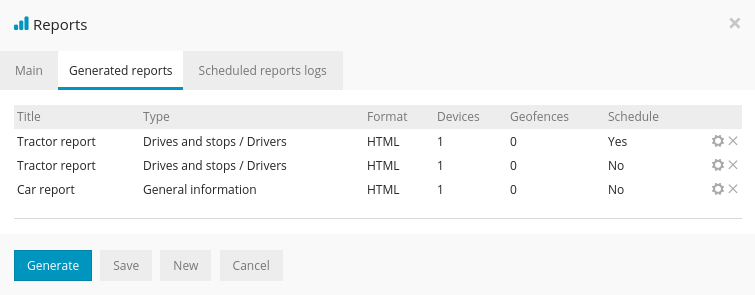
Generated reports
All generated reports can be visible in this tab. You can modify, regenerate and delete them.
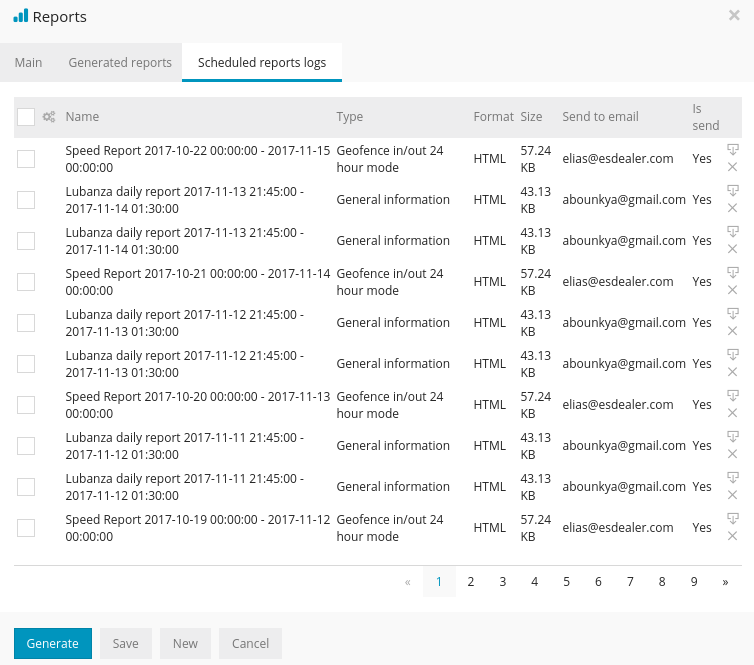
Scheduled reports logs
All scheduled generated reports. In case you did not received them via email, or don't need to, you can review them all here.
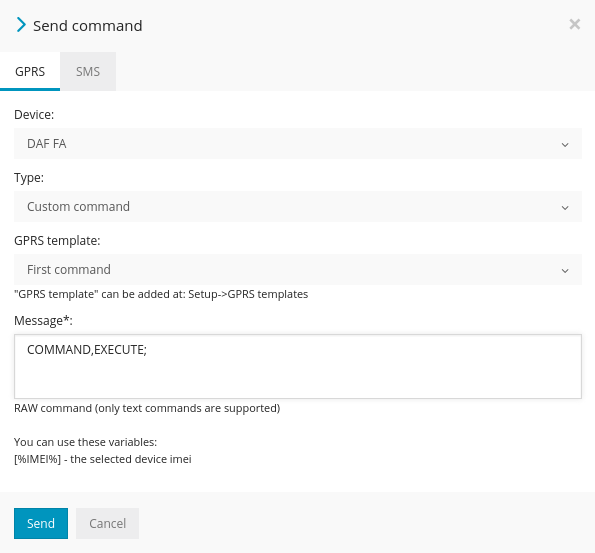
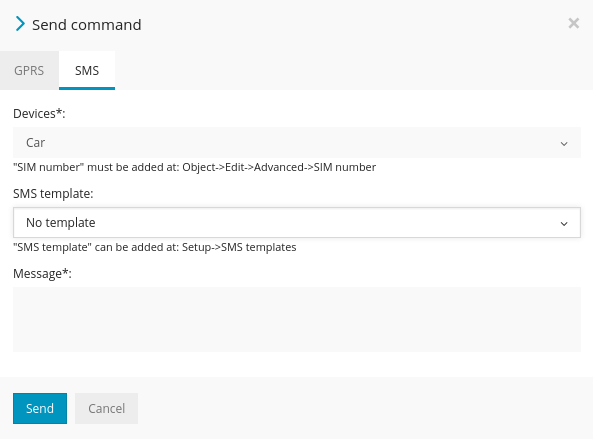
Tools: Send command
Commands can be sent via GPRS or SMS(sms gateway must be enabled (Setup->SMS)).
Type - if you select custom command, you will be able to send RAW gprs command to the device or select GPRS template you created in Setup->GPRS Templates.
If you want to see your specified gprs commands for selected device only, please go to Objects->Edit->Advanced->Show gprs templates only.
In order to send sms command to the device, sms gateway must be enabled (Setup->SMS).
Tools: Other
Ruler
To check distance between 2 or more points, click Tools->Ruler and start clicking on the map.
POI
POI - point of interest. These are the icons that you can put anywhere in the map and create label for it. POI import file format is .KML.
Show point
With this tool you can see point on the map by entering coordinates or address.
Show address
Shows an address by coordinates.
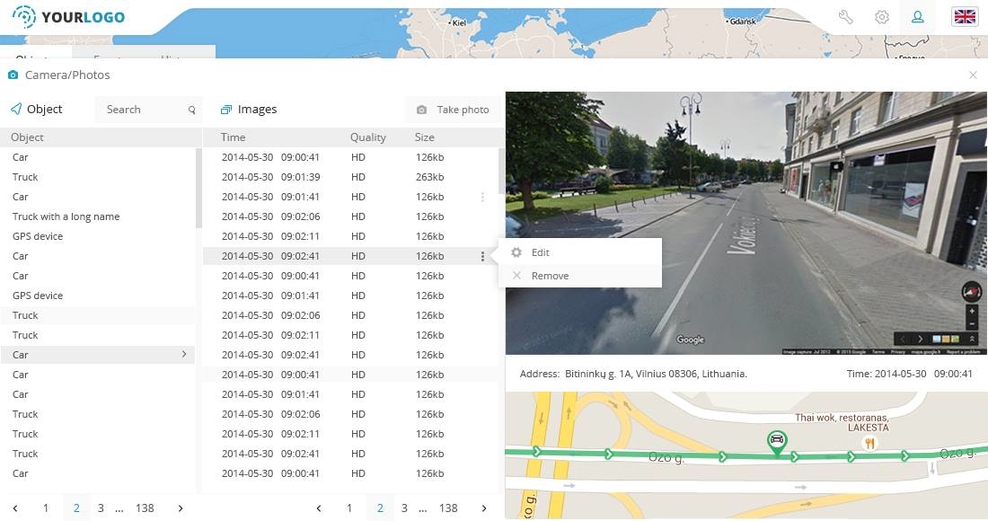
Tools: Camera
Camera/Media tool
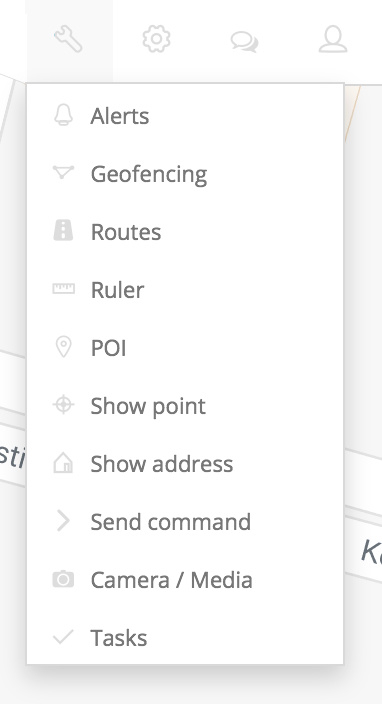
With this tool you can capture images from every GPS tracker, which has a camera attached. In the window you can see all trackers that have the cameras attached, you can also view the photos taken, select the camera via its id, if there are more than 1 camera attached to it, view the address and the map where the photo was taken.
It can be found through the main menu Tools>Camera/Media.
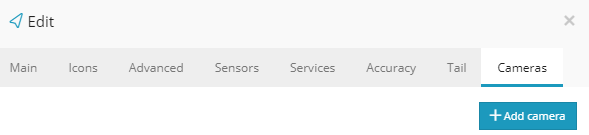
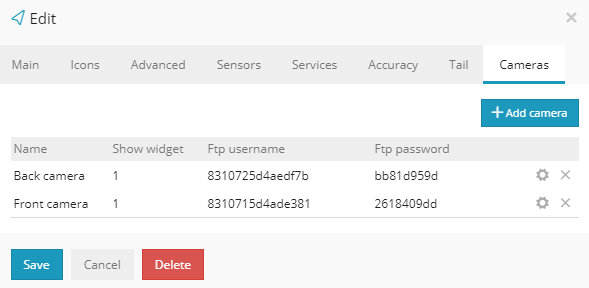
Camera/DVR tool
If gps tracker does not support camera or you want to connect any other camera in the car, no matter which gps tracker you are using, this tool might be handy. Once ip camera or cameras are connected in the car, gps coordinates will be matched with camera by the closest available date and time.
To begin, please go to Edit device->Cameras->Add camera:
Tools: Tasks
To create a task, navigate to Tools -> Tasks
A new window will appear that will ask you to fill out the necessary details for the task, such as the pickup and delivery addresses, the name of the task, priority, description and the object for the task to be assigned to.
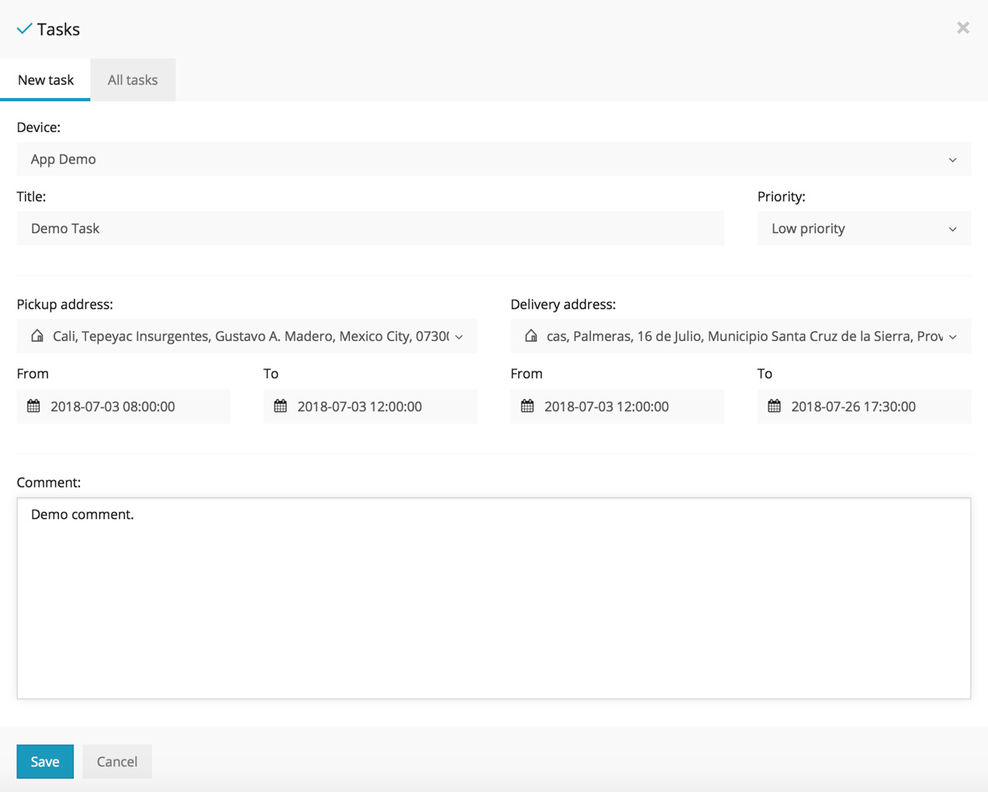
Once all of the information is entered, select "Save" and open the mobile GPS tracker application.
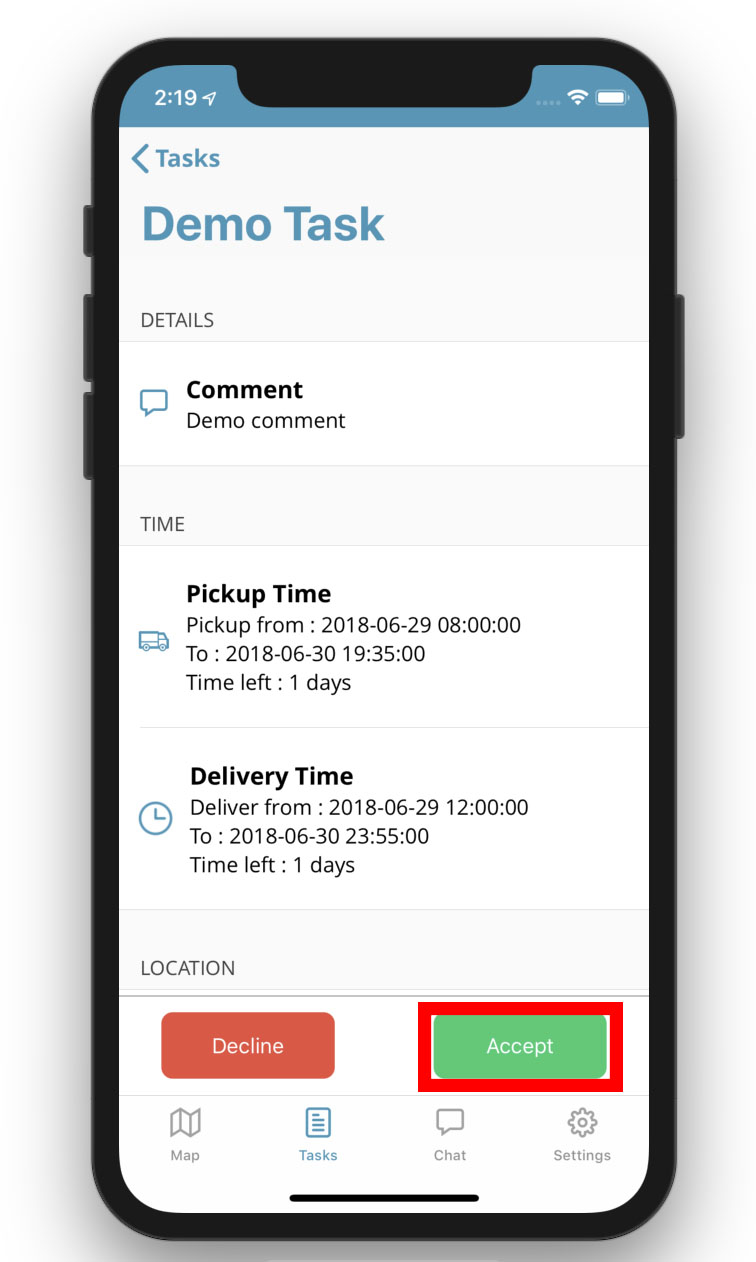
From the application, navigate to the Tasks tool and you will be greeted with the tasks assigned to object. To accept the task, hit "Accept".
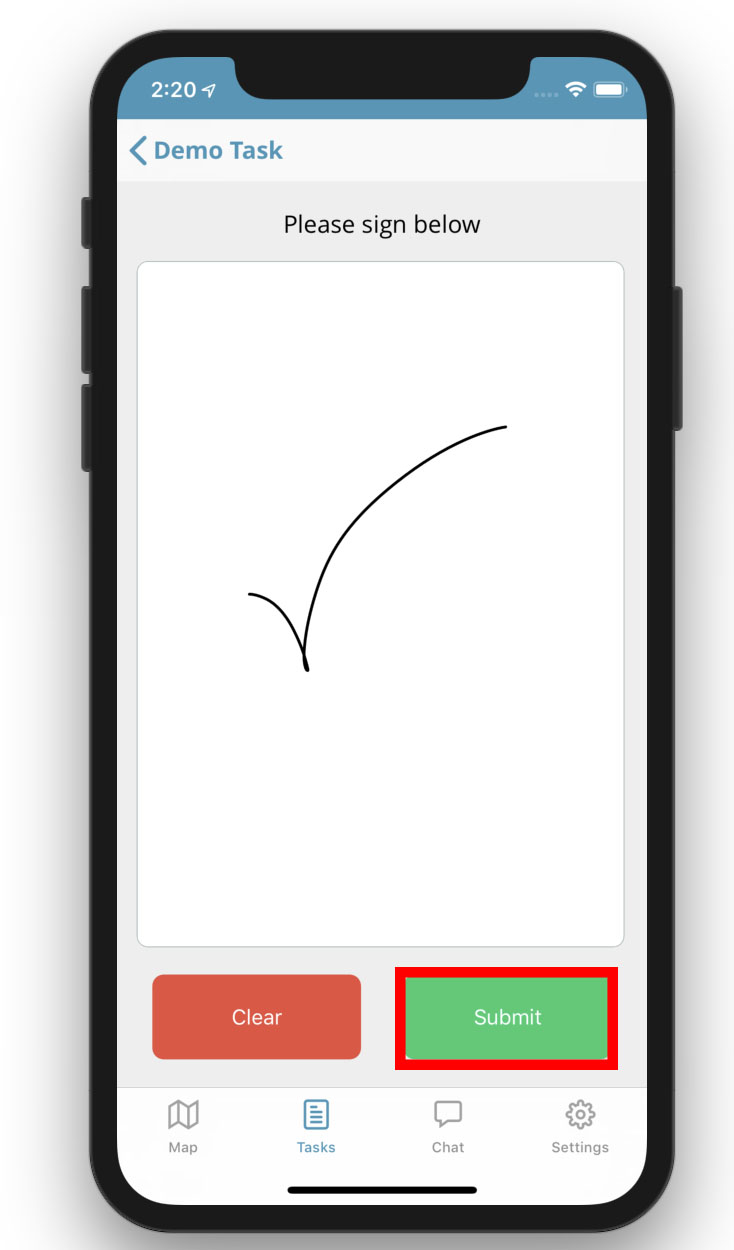
Once the task is complete, you will be able to leave a signature, confirming that the task is complete.
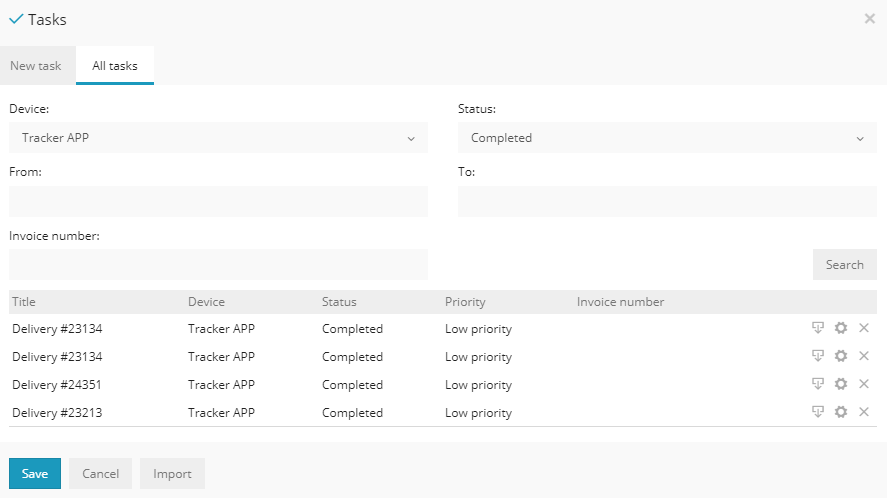
To view the status of all the created tasks select the "All tasks" option from the web platforms Task feature.
You will also be able to view the signature of the completed deliveries.
Tools: Maintenance
With the maintenance tool, you can setup vehicle maintenance schedule to remind you of when the next vehicle service is due.
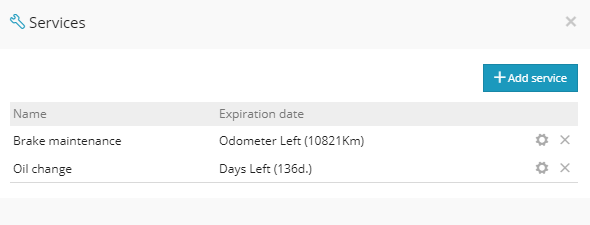
To open the maintenance tool, either select the "Services" tab within the objects details, or by enabling the "Service" widget in Setup -> Widgets, which appears at the bottom of the map when selecting and selecting the gear icon.
Accessing the maintenance tool via object's details:
Via "Service" widget by selecting the gear icon:
Once selected, you will be prompted to enter the following information:
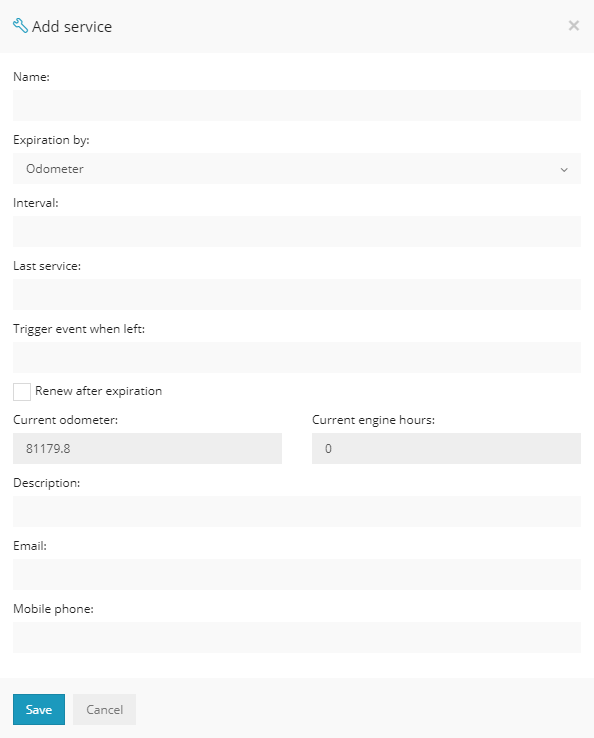
Name: In this field you can add a name for the scheduled service.
Expiration by - This is used to setup an expiration when the vehicle reaches a specific interval for one of the following options.
- Odometer
- Engine hours
- Days
Interval: Setting a specific odometer, engine hours or day intervals when the vehicle is due for maintenance
Last service: Used to enter a value when the vehicle was last serviced (odometer, engine hour or date value)
Trigger event when left: A value to be entered if an alert should be triggered when there is a specific amount left before the service.
Renew after expiration: Automatically renews the service schedule.
Description: A brief description of the service.
Email/Phone number: Required if an alert needs to be sent before the vehicle's service.
To view all of the created maintenance schedules, navigate to Tools -> Maintenance

Tools: Dashboard
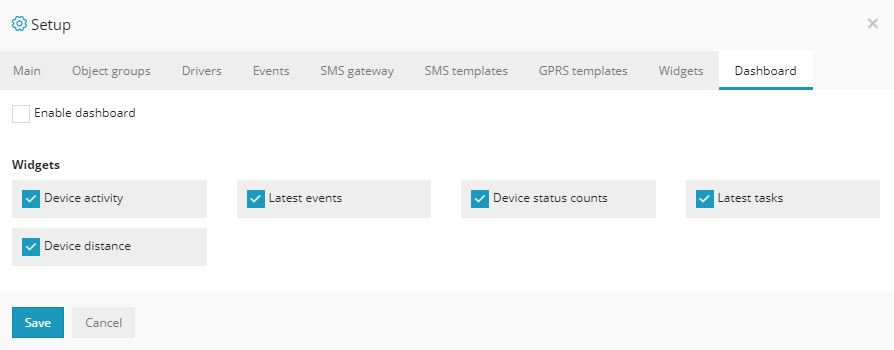
The dashboard feature is used to display useful information in a more comprehensive way. It can be used to display device activity, events, device count (online/offline), task count and progress and the distance travelled by the devices.
It can opened manually or by setting up that the dashboard opens up everytime you open the map.
To enable the dashboard to open automatically and to enable which information to display, navigate to Setup -> Dashboard.
To open the dashboard manually, navigate to Tools -> Dashboard
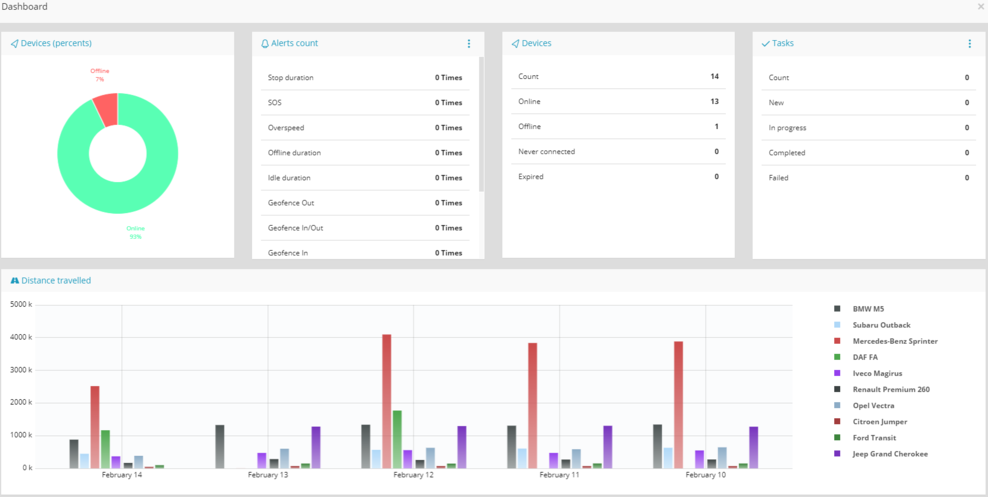
An overview of the dashboard:
Tools: Sharing
The Sharing tool is used to create a shareable link to track GPS objects without having to login to the web platform.
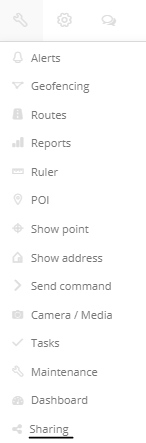
To access the Sharing tool menu, navigate to Tools -> Sharing.
Once opened, you will be greeted with the following menu:
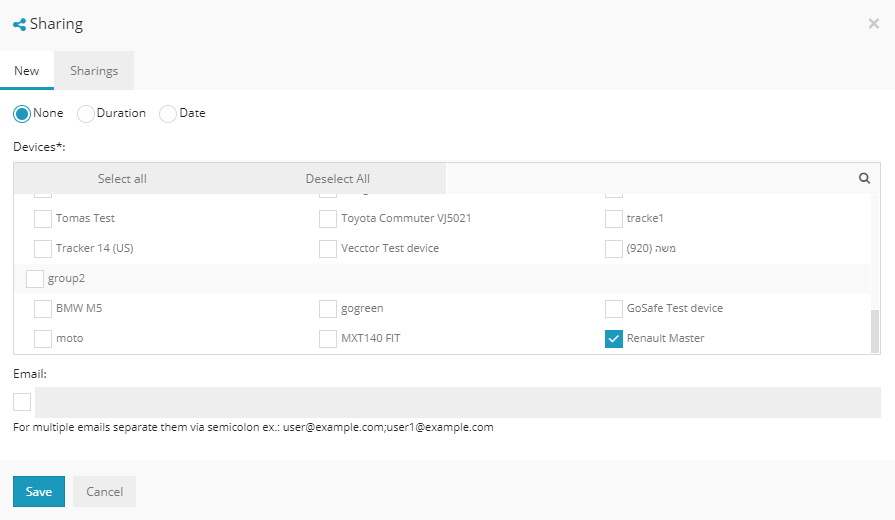
To created a shareable link, select the devices from the list that you'd like to be displayed in the map for others to see.
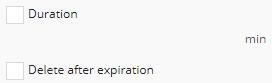
There are 3 options for durations:
None - The link will last indefinetaly until it is deleted.
Duration - The link will be accessible for a specific duration, which is up to 180 minutes.
Date - A specific date can be set until the sharing link will expire.
- Delete after expiration - this option is available when an expiration time/date is set for the link to delete it once it is expired.
To view, edit and delete the created sharing links, navigate to "Sharings" from the top of the menu.

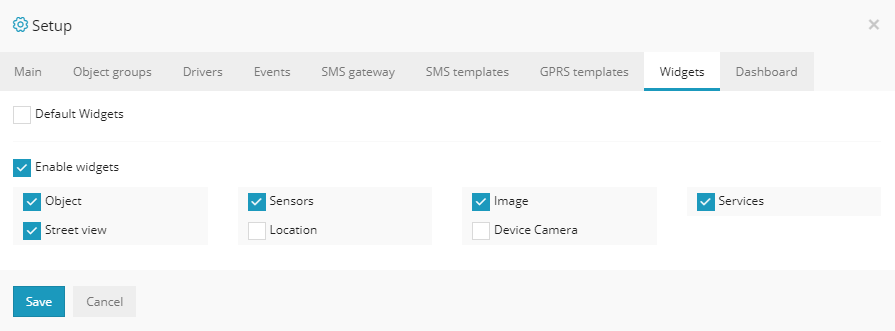
Widgets
You can edit which widgets you would like to see on your main map using .
By disabling 'Default widgets' you can make an addition or remove them.
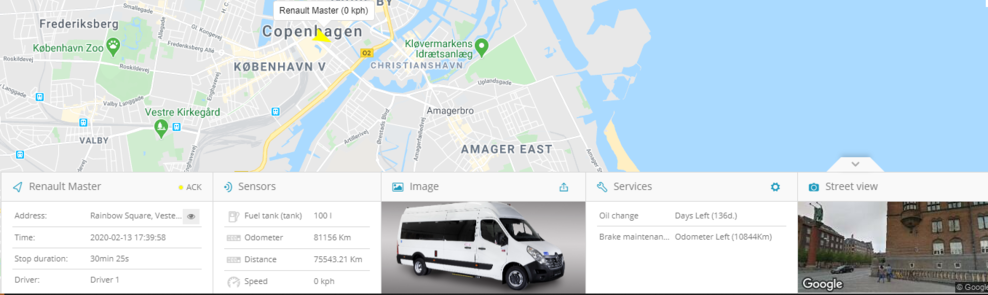
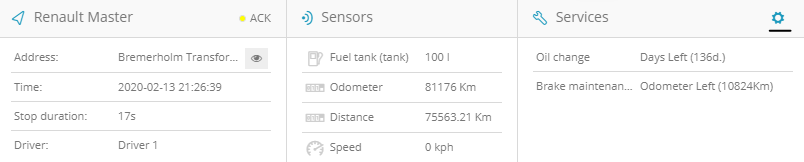
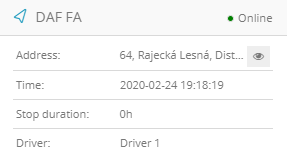
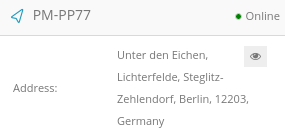
Object
The object widget displays the devices information, such as the address, time, stop duration and the driver occupying the vehicle.
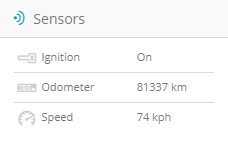
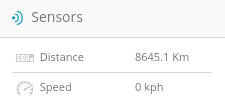
Sensors
It shows all of the added sensors for the vehicle - fuel level, ignition status, current speed. Many more sensors can be setup and displayed.
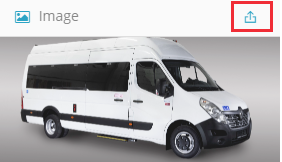
Device image
The device image widget provides the ability to add the vehicles image on the main map. To upload the image of the device, select the "upload" button in the top right corner of the widget and upload the image that you would like to be displayed.
Services

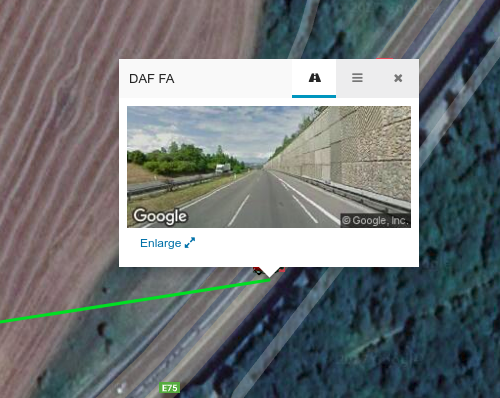
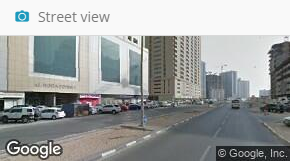
Street view
The Street view widget shows the objects current location from Google Street view.
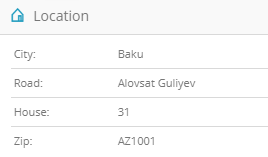
Location
Displays more detailed information about the objects location, such as the city, road name, house number if parked close and the ZIP/Postal code.
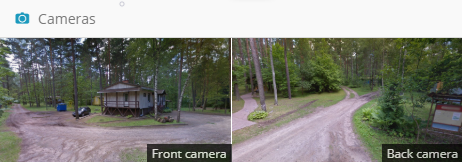
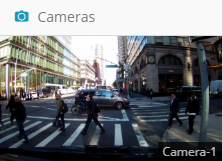
Device camera
Shows the latest photo taken by the GPS tracker with a built-in or with a connected IP camera.
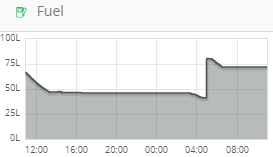
Fuel
Reports: Samples
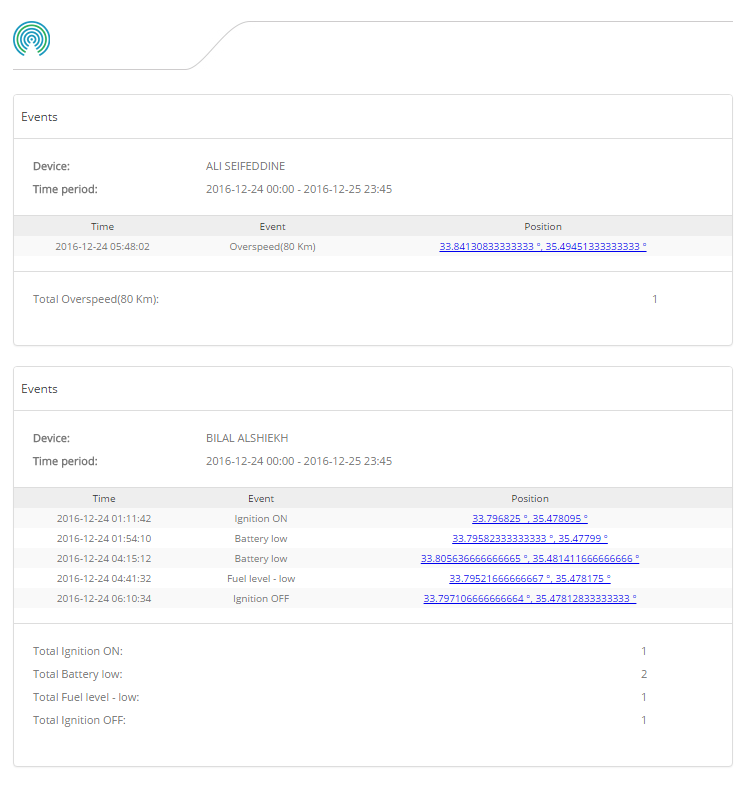
Events
Drives and stops
Engine hours daily

This report displays the total engine hours for the whole day.
Fuel level
Fuel fillings
General information
General information (merged)
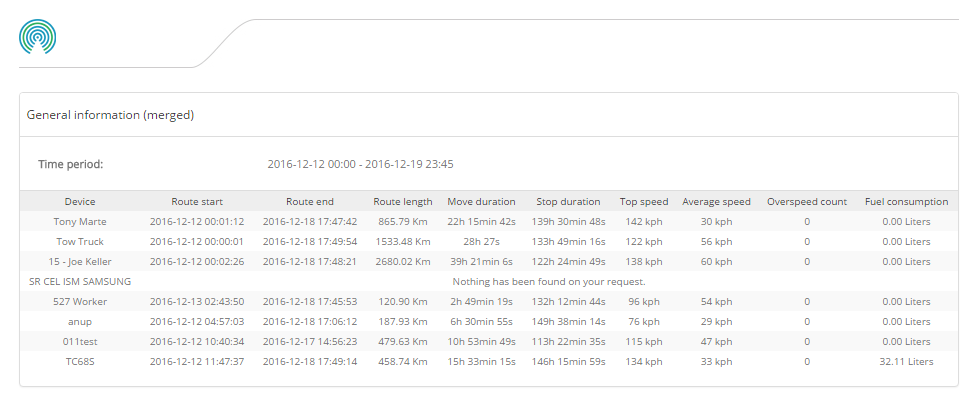
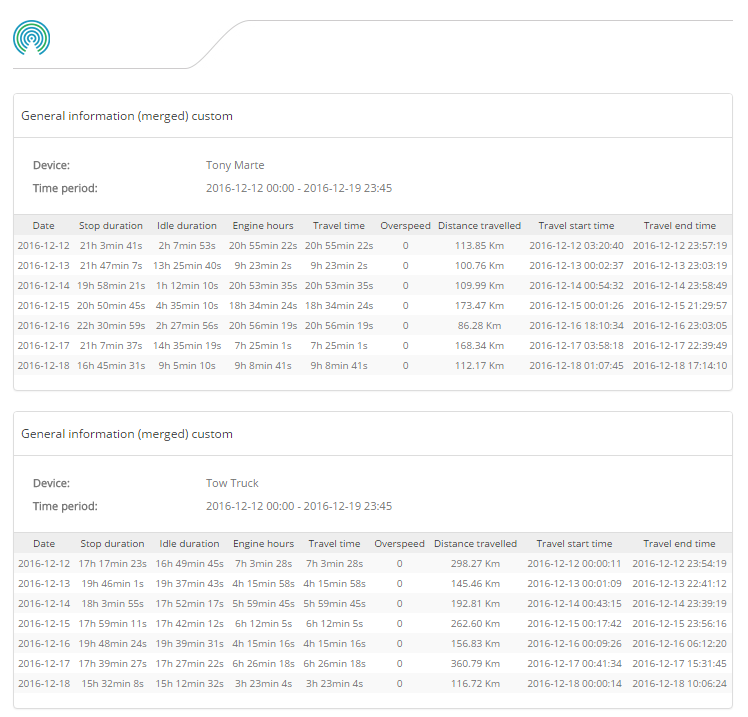
General information (merged) custom
General information (merged) custom 2

General information (merged) custom 3
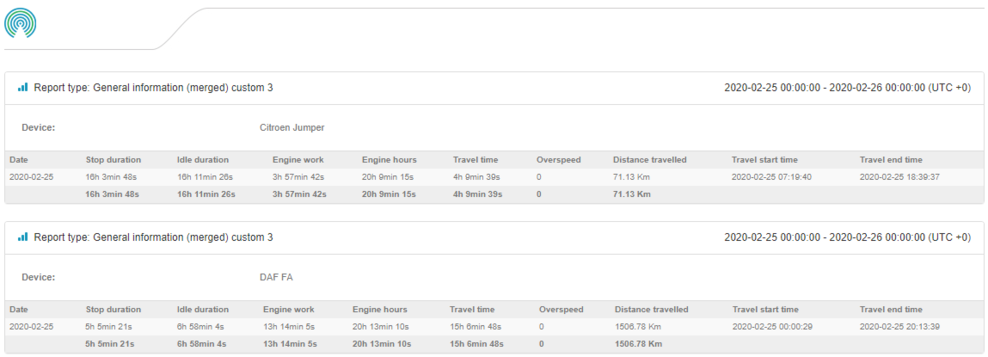
Displays the same information as General information (merged) custom, but each device information is split into different tabs.
Geofence in/out
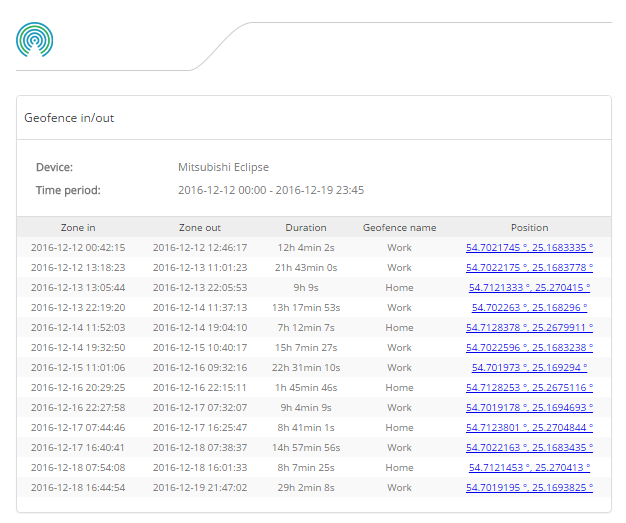
Standard geofence report:
In time: 12.00 hours 21.1.2016
Out time: 8.00 hours 22.1.2016
– spent time 20 hours
24 hour mode: spent time is being separated on midnight:
In time: 12.00 hours 21.1.2016
Out time: 0.00 hours 22.1.2016
– spent time 12 hours
In time: 0.00 hours 21.1.2016
Out time: 8.00 hours 22.1.2016
– spent time 8 hours
Geofence in/out (Ignition ON/OFF)

Similar layout to the in/out report, but with an additional column, stating the ignition status.
Geofence (Touch all)
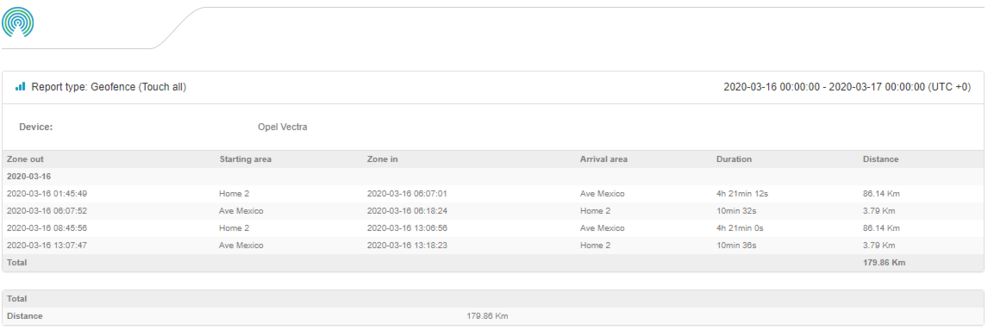
This report type only generates if the device has entered/exited all of the selected geofences during the specified period.
Ignition ON/OFF
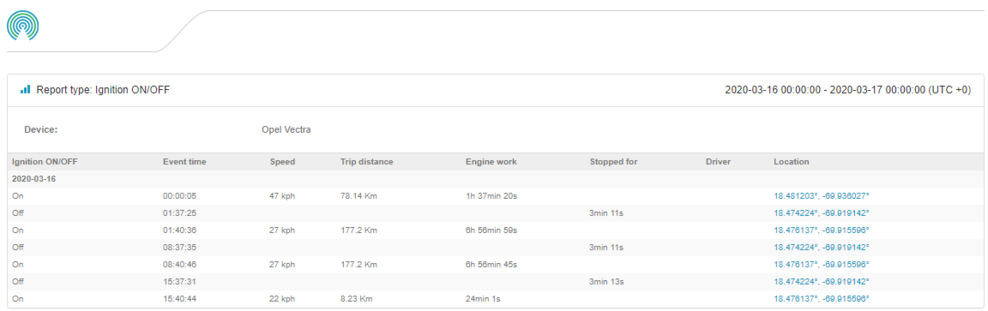
In this report, it displays when the Ignition of the vehicle was turned on and off. It also displays when the event occured, the average speed during the trip, trip distance, total engine hours. When the ignition is off, it also displays the amount of time it was turned off and the location.
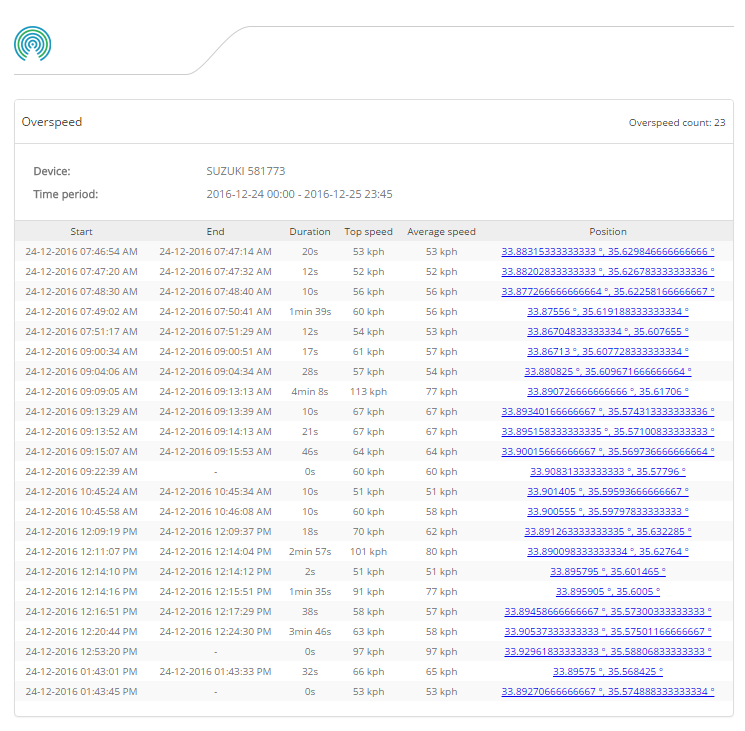
Overspeed
Overspeed / Geofences
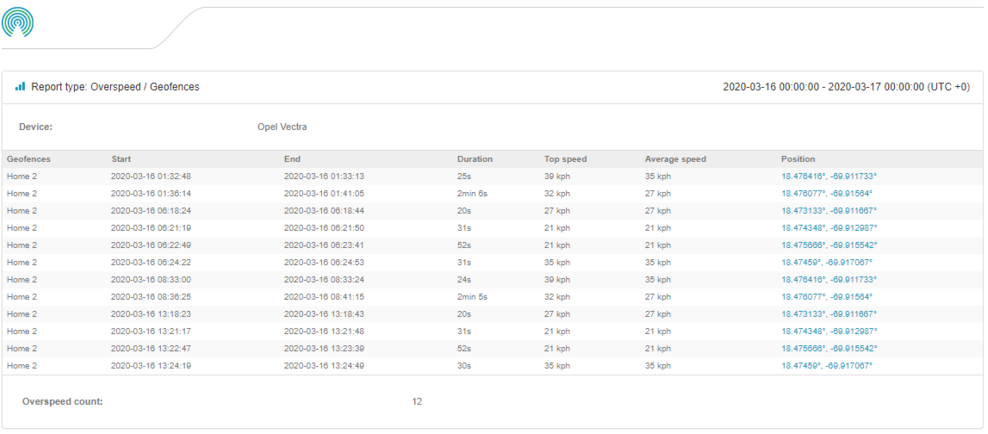
This report displays overspeed information in selected geofences. Layout is the same as the Overspeed report.
RAG (Driver's performance)

Harsh braking and harsh acceleration sensors must be configured first, in order for this report to be generated. Final scores are calculated in excel file by formula. You can adjust that formula any time.
Temperature
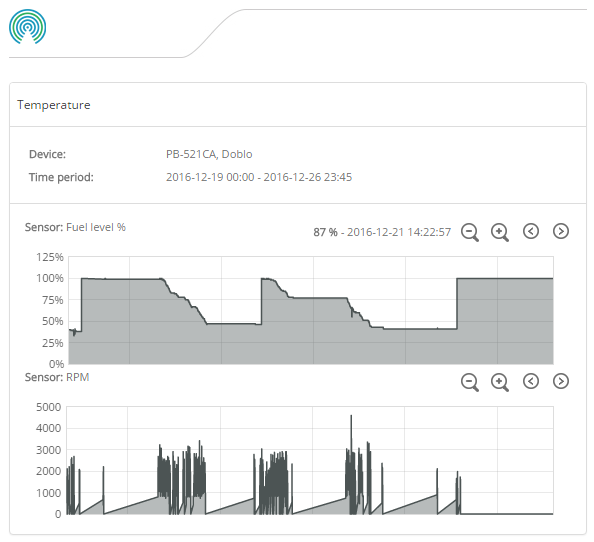
At least 1 sensor with temperature template must be created. You can create multiple sensors using temperature template and all those sensors will be showed in the report.
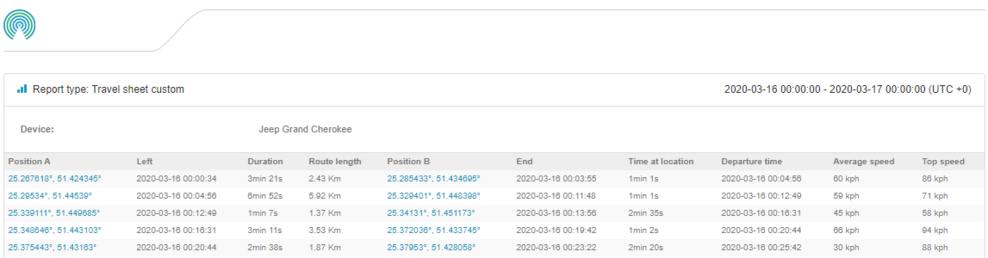
Travel sheet

Travel sheet custom
Routes
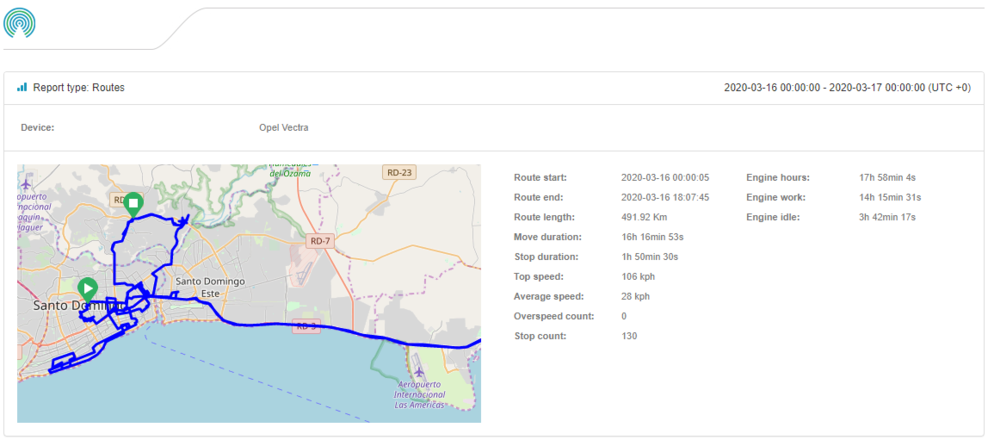
The routes report represents the whole route that the vehicle drove with a map embedded. It also provides relevant information such as the total distance travelled, top speed, average speed, stop count.
Sent commands

With this report, you can generate a list of commands of all the users from your platform have executed and its status.
Work hours daily

A basic report that states the travel time, start and end and distance travelled.
Plugins
Plugins can be enabled or disabled in admin control panel and they are found in Admin -> Setup-> Plugins. Below are list of plugins and descriptions of what they do. This page is constantly updating as more plugins are developed by the time.
Objects list
Once enabled, additional icon will appear in objects list. This icon will open up new window with additional configurable information.
Business / Private drives
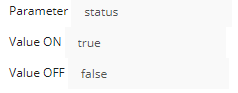
Route Color
When enabled, an additional sensor template will be available. It is used to display a different color in the device history when specific parameter criteria is met.
For example, if the ON parameter sends a set value, the color of the route will change to a selected one.

Device move animation
This plugin enables a movement animation of the object's arrow on the map, simulating a real time movement.
Device widget total distance
Displays the total distance the device traveled. Distance is calculcated by the software between the GPS data points sent by the device. The distance is located in the sensors widget of the devices.
Device widget show full address
In the "Object" widget, it will display the full address instead of a shortened one.
Alert sharing notification
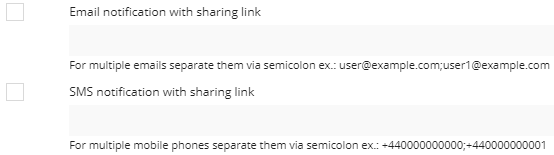
When the plugin is enabled, you will be able to send an alert notification with a link via email and SMS to view the objects location and movement in the map.
It is possible to set a an expiration time in minutes before the link becomes inactive. The "delete after expiration" option deletes the link permanently in the "Sharings" tab of the "Sharing" tool.
In the "notifications" tab, there will be 2 additional lines for emails and phone numbers that should receive the sharing link when the alert is triggered
Locking
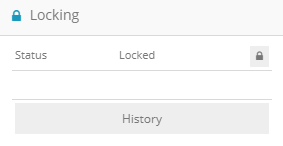
This plugin adds an additional widget in the maps toolbar that displays the status of a lock that is built in a GPS device.
In the settings of the plugin, specify the parameter that sends the lock status as well as the parameters.
Call actions
The Call Actions plugin adds the ability to add a an additional description to every event. Why the events occured.
SIM Blocking
The SIM Blocking plugin add the ability to manage expired SIM cards and block it on SIM card provider platform.

Display Geofence size
The Display geofence size plugin add the ability to manage size of geofence.
Geofence move by device
The Geofence move by device plugin add the ability to create geofence around moving object and moves together with it.
Display address in history section
The Display address in history section plugin add the ability to see address instead of coordinates in the history section of the object.
Display address in event section
The Display address in event section plugin add the ability to see address instead of coordinates in the Event section.
Admin panel: Overview
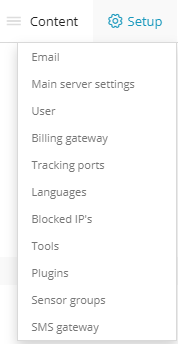
Admin panel: Setup
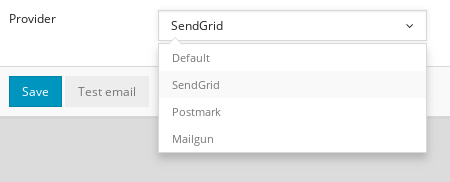
Admin panel - Setup has the menu for setup email, server settings, etc.

Main server settings
See separate page for "Main server settings" here >>
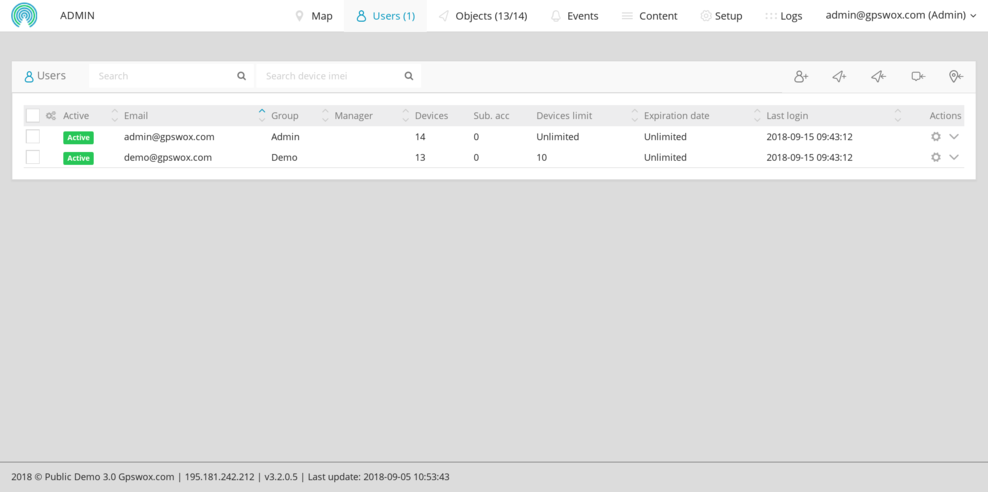
User
The "User" panel provides the ability to apply settings to all new users.
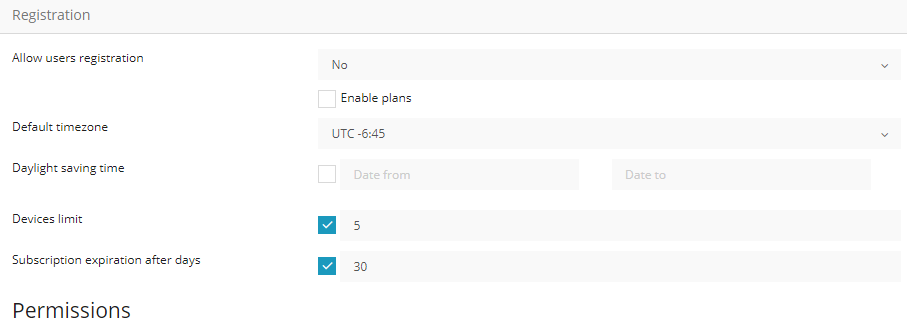
Allow registration - If enabled, new users can register from the login screen of the platform.
- Enable plans - This option enables plans for users. Each plan can be configured to allow specific features, device limit and period for a set price.
Default timezone - This setting applies a timezone to all new registered/created users.
Daylight saving time - If applicable, set the daylight savings time date.
Devices limit - A set amount of devices the user is able to create or it can be disabled to allow an unlimited object count. (This setting only applies if plans are not enabled)
Subscription expiration after days - A specific duration until the user expires after first registration. Can also be disabled. (This setting only applies if plans are not enabled)
Permissions - These are the permissions for features that every new user will receive upon registration. (This setting only applies if plans are not enabled)
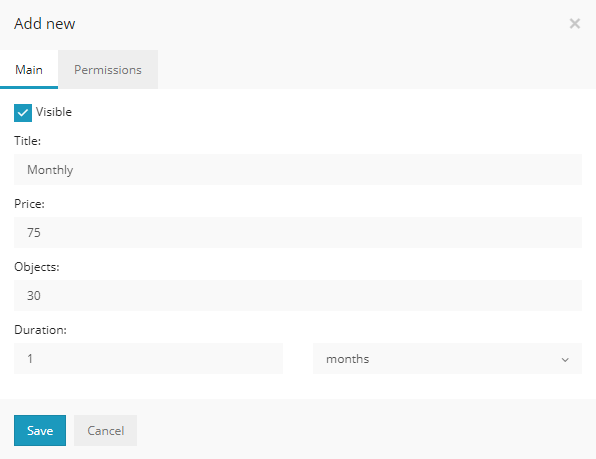
To add paid plans to users, the "Enable plans" option has to be checked.
On the right corner of the "Plans" tab, select the "+" to create a new plan.

A new window will come up, prompting to fill out the title of the plan, price, object limit and duration. In the "Permissions" tab you can select which features the user is able to user for specific plans. The currency is used based on the settings in the "Billing gateway" tab.
Billing gateway
In this tab you can setup payment gateways if there are paid plans created and enabled.
Each payment gateway will require a set of keys and other information filled out in order for it to function. Please refer to the documentation provided by the gateway or contact their support for assistance in acquiring the required information.
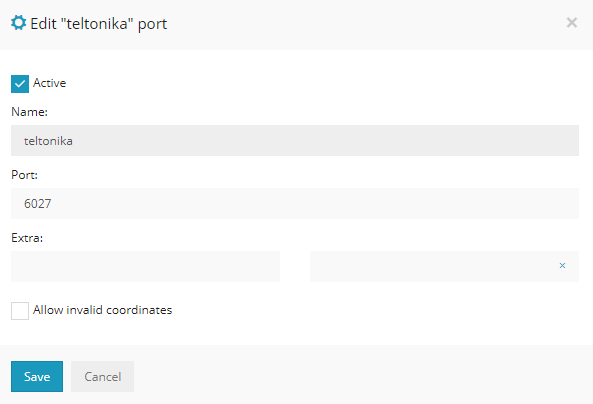
Tracking ports
This is a list of all of the ports for each protocol that is integrated.

Languages
This is a list of all languages that are available in the platform.
If there are incorrect translations for your language, you can adjust them in the languages settings. They're location to right of screen. Under "Actions" select "Translate" to correct the translations.
The name and availability of the language can also be changed using the "Edit" option.
Blocked IP's
With this tool you can block an IP address to prevent flooding of the server with unwanted messages from a device or server.
To block an IP address, select the "+" icon on the right of the screen.
Tools
From the "Tools" tab, there are controls for database backups and clean up.
Database backups
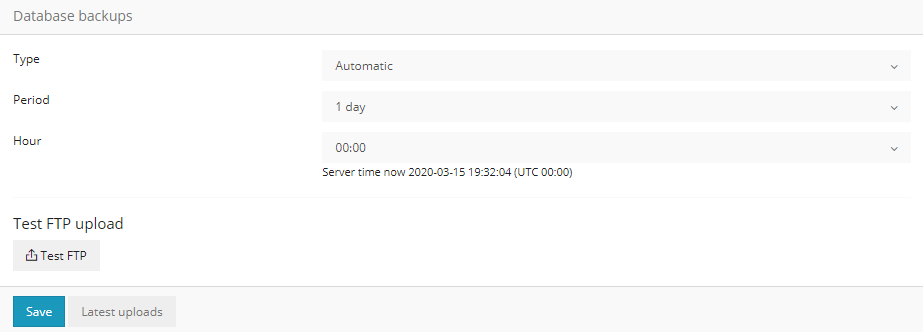
Type:
- Automatic - these are done automatically by the system to our external servers if the daily backups plan is active.
- Custom - allows to upload database backups to your own external server.
Period: How often the system should send backups to an external server
Hour: During which hour the database backups should be scheduled. The time is taken from the currentl servers time.
Device history database cleanup
The following options allow you to control how often the database should be cleaned. This is used to avoid overflooding the database, which will cause issues to the softwares availability.
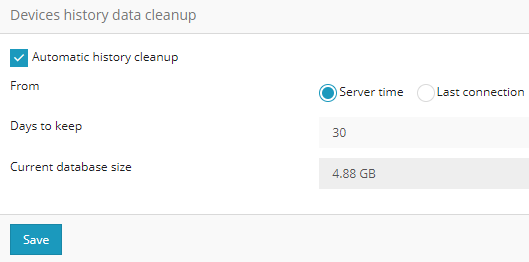
The system allows 2 methods of cleanup:
Server time - this option cleans up the database every 30 days for every device since the first start of the software.
Last connection - this option cleans up the database every 30 days since the devices first connection.
Current database size - how much the database is taking up hard drive space.
Plugins
From this tab you can enable certain tools and features which are not enabled by default.
All of the plugins and explanations can be found .
Sensor groups
With this tool, you are able to create a sensor group from which multiple sensors can be applied to a device at the same time. It helps to avoid the manual process of creating the same sensors for each device individually.
To create a sensor group, select the "+" icon on the right corner. Once the menu shows up, grant the sensor group a title and hit save. The sensor group will show up in the list. To add sensors to the group, under actions on the right, select the gear icon and hit edit.
You can add as many sensors as needed. Once the sensors are created, navigate to the object's sensor tab and on the bottom of the menu, select the sensor group you've created from the "Sensor groups" drop down list.
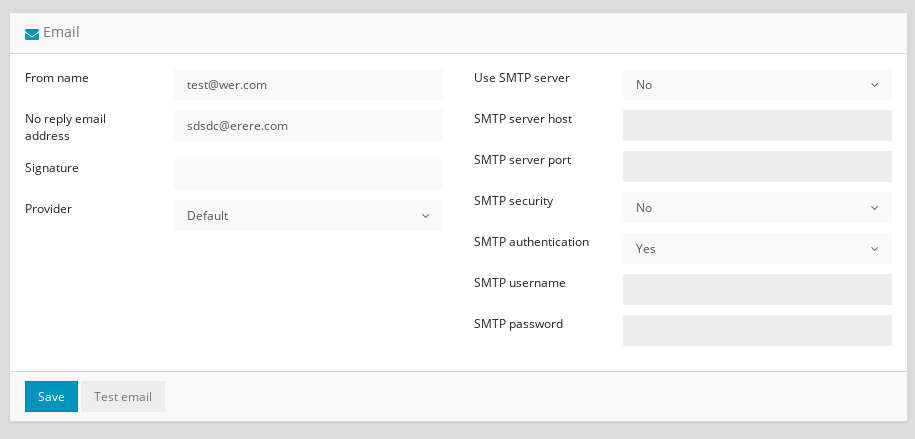
SMS Gateway
This tool is used to forward SMS message from the platform to a tracking device or mobile phone. Either for automatic GPS tracking device configuration or receive alerts.
The SMS gateway service needs to be purchased from an external provider, such as Plivo, BulkSMS, or any other.
We also have an SMS Gateway application for Android devices, which will forward SMS messages to other users, devices. The application can be downloaded .
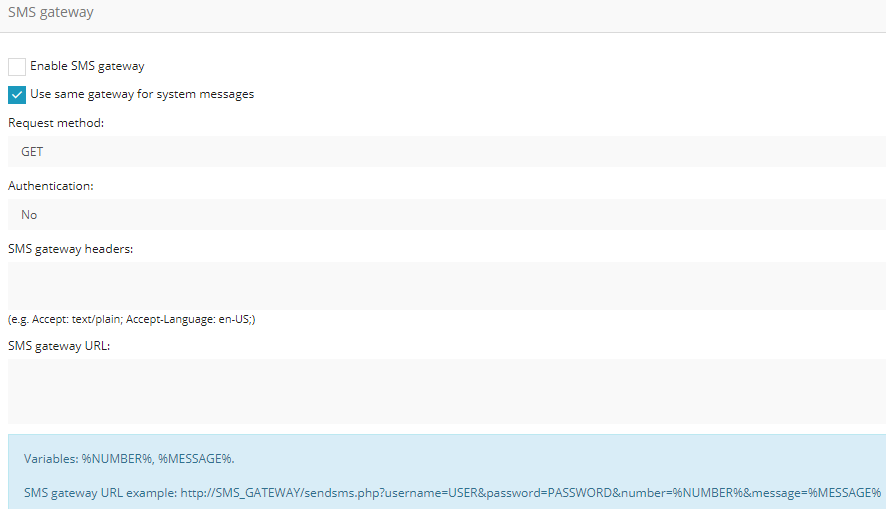
Enable SMS Gateway - Enable or disable the SMS gateway that is configured in the admin panel for other users. In this case, each user will have to setup their own SMS gateway.
Use same gateway for system messages - Allows users to use the configured gateway in the admin panel for system messages, for example, GPS device activation.
Request method - Available methods are GET and POST. Refer to the SMS gateway provider documentation for the correct method.
SMS Gateway headers - Required headers by the SMS gateway provider.
SMS Gateway URL - A complete URL string that will be used to send SMS messages.
Admin panel: Setup - Main server settings
Overview
There are 2 section of this menu page: Main server settings configuration panel and Logo panel.
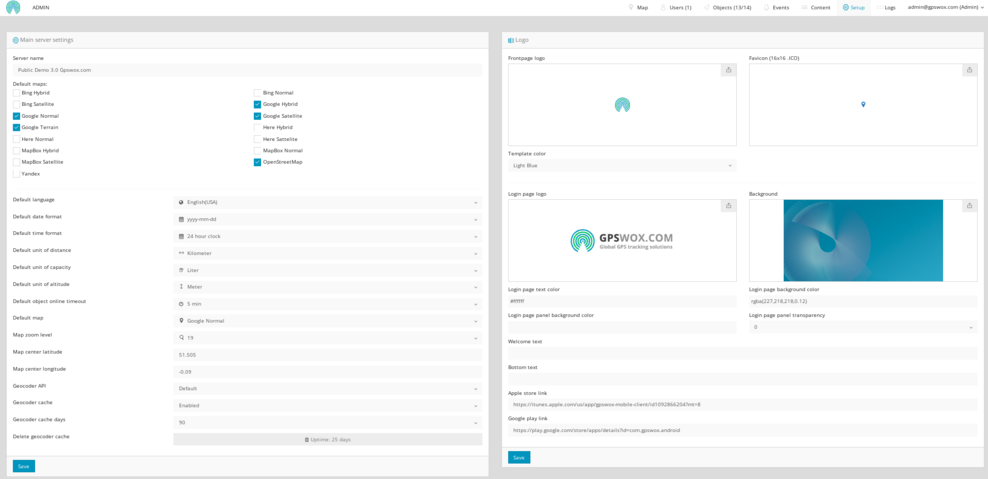
Main server settings
Server name
The text here will be showed on browser tab title and also in footer part of the page in Admin panel.
Default maps
All new users will be granted access to selected maps by default. It won't change existing users settings. So for example if existing user has Google Normal enabled, disabling it here won't change it on user settings.
Also the key is required for map to work. For example HERE map will require to enter HERE.com app ID and HERE.com app code.
The default zoom level and map center coordinates can be configured for all users.

Default language - this settings applies to all new users. The selected language will be default throughout the platform.
Default date format - default date format that applies to all users.
Default time format - default time format for all users.
Default unit of capacity - applies to all users. Can be set in liters gallons.
Default unit of alititude - can be set in either meters or feet.
Default object online timeout - it is used to disconnect the session between the device and the server if the tracking device is stationary after a set amount of time.
Geocoder API
There are different geocoder API sources that can be chosen.

Default - GPSWOX geocoder service that uses OpenStreetMap data.
Google API - Geocoder API from Google. It requires geocoder API key to be entered for this geocoder to work.

OpenStreet API - OpenStreetMap geocoder service provided for free.
Geocod.io API - requires key to work.
LocationIQ API - requires key to work.
Nominatim - requires URL to work.

Miscellaneous settings
Expire notification before days - this is used to send an email before the user or device is about to expire.
Expire notifications after days - used to send a notification after the device or user has expired after a set amount of days.
Logo panel
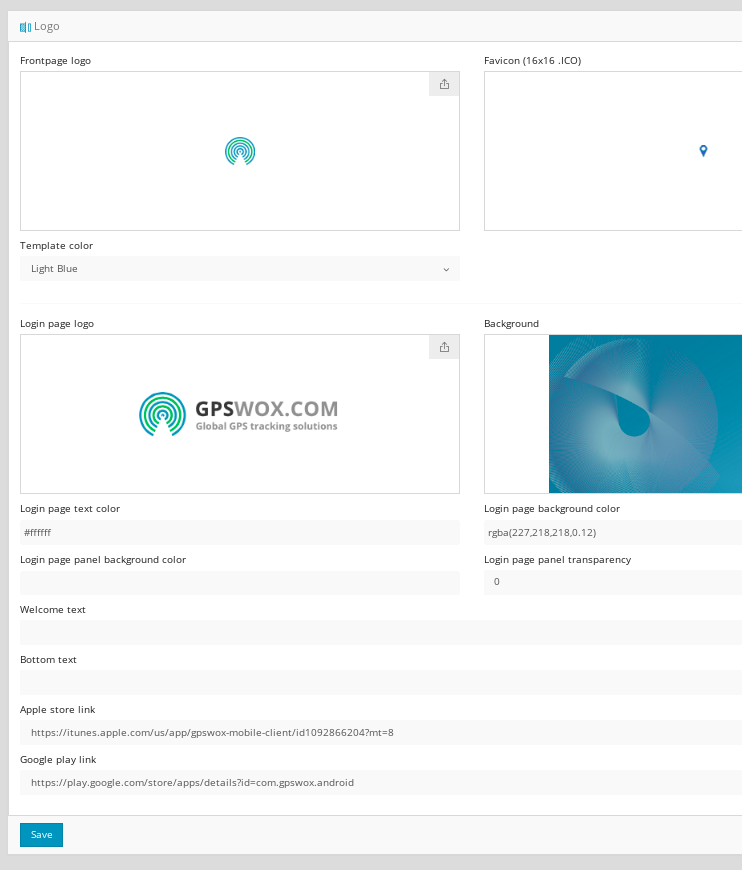
Frontpage logo should not exceed 60px in height.
Favicon size must be 16x16 pixel size in .ICO file format.
Template color can be selected from existing list.
Global parameters
- ignoreFixTime / true or false - mostly used for Queclink devices, if you experience "Jumps" in history, please set this value to false.
- extended / true or false - for xexun protocol only
- can / true or false - for aplicom protocol only
- hbm / true or false - suntech protocol
- includeAdc / true or false - suntech protocol
- timeout / 1-9999 - connection timeout value in seconds. Because sometimes there is no way to detect lost TCP connection, old connections stay in open state. On most systems there is a limit on number of open connection, so this leads to problems with establishing new connections when number of devices is high or devices data connections are unstable.
- timeoverride / true or false - once enabled, gps tracker time will be decoded the same as server time, this will fix the issue if tracker is always sending incorrect date and time.